Books and Beyond Management System
·Overview
The system has two sides:
- The staff console — where the team logs in to see, judge, and work tickets, manage clients, and run the firm.
- The client portal — clients never log in. Each client gets a private magic link you share with them; opening it lets them submit concerns and track their own tickets.
Every concern becomes a ticket with a control number (e.g. BK-2026-0042).
A reviewer sets its priority and a one-line summary, it auto-assigns to the right desk, and
it moves across the board until it's resolved. Nothing is ever lost — every ticket keeps a
full, timestamped history.
1.Signing in
Open the console and sign in with the email and password an admin set for you.

2.Roles & access
What you can see and do depends on your role. There are four staff roles.
| What they can do | Staff | Reviewer | Admin | Super Admin |
|---|---|---|---|---|
| Work their own assigned tickets (status + note + proof photo) | ✓ | ✓ | ✓ | ✓ |
| Manage their own account (password, Telegram, board columns) | ✓ | ✓ | ✓ | ✓ |
| See & work every ticket, across all departments | — | ✓ | ✓ | ✓ |
| Set a ticket's priority | — | ✓ | ✓ | ✓ |
| Approve resolutions (sign off work is done) | — | ✓ | ✓ | ✓ |
| Reassign a ticket to a different person | — | — | ✓ | ✓ |
| Delete a ticket (and restore it) | — | — | ✓ | ✓ |
| Manage Clients, Team, Settings, Schedule | — | — | ✓ | ✓ |
| Send announcements + see all-staff History + create admins | — | — | — | ✓ |
In plain words: Staff do the work on their own tickets · Reviewers oversee everything and set priority / sign off · Admins run the system · Super Admins are the owner account (everything, plus announcements and history).
3.The Dashboard
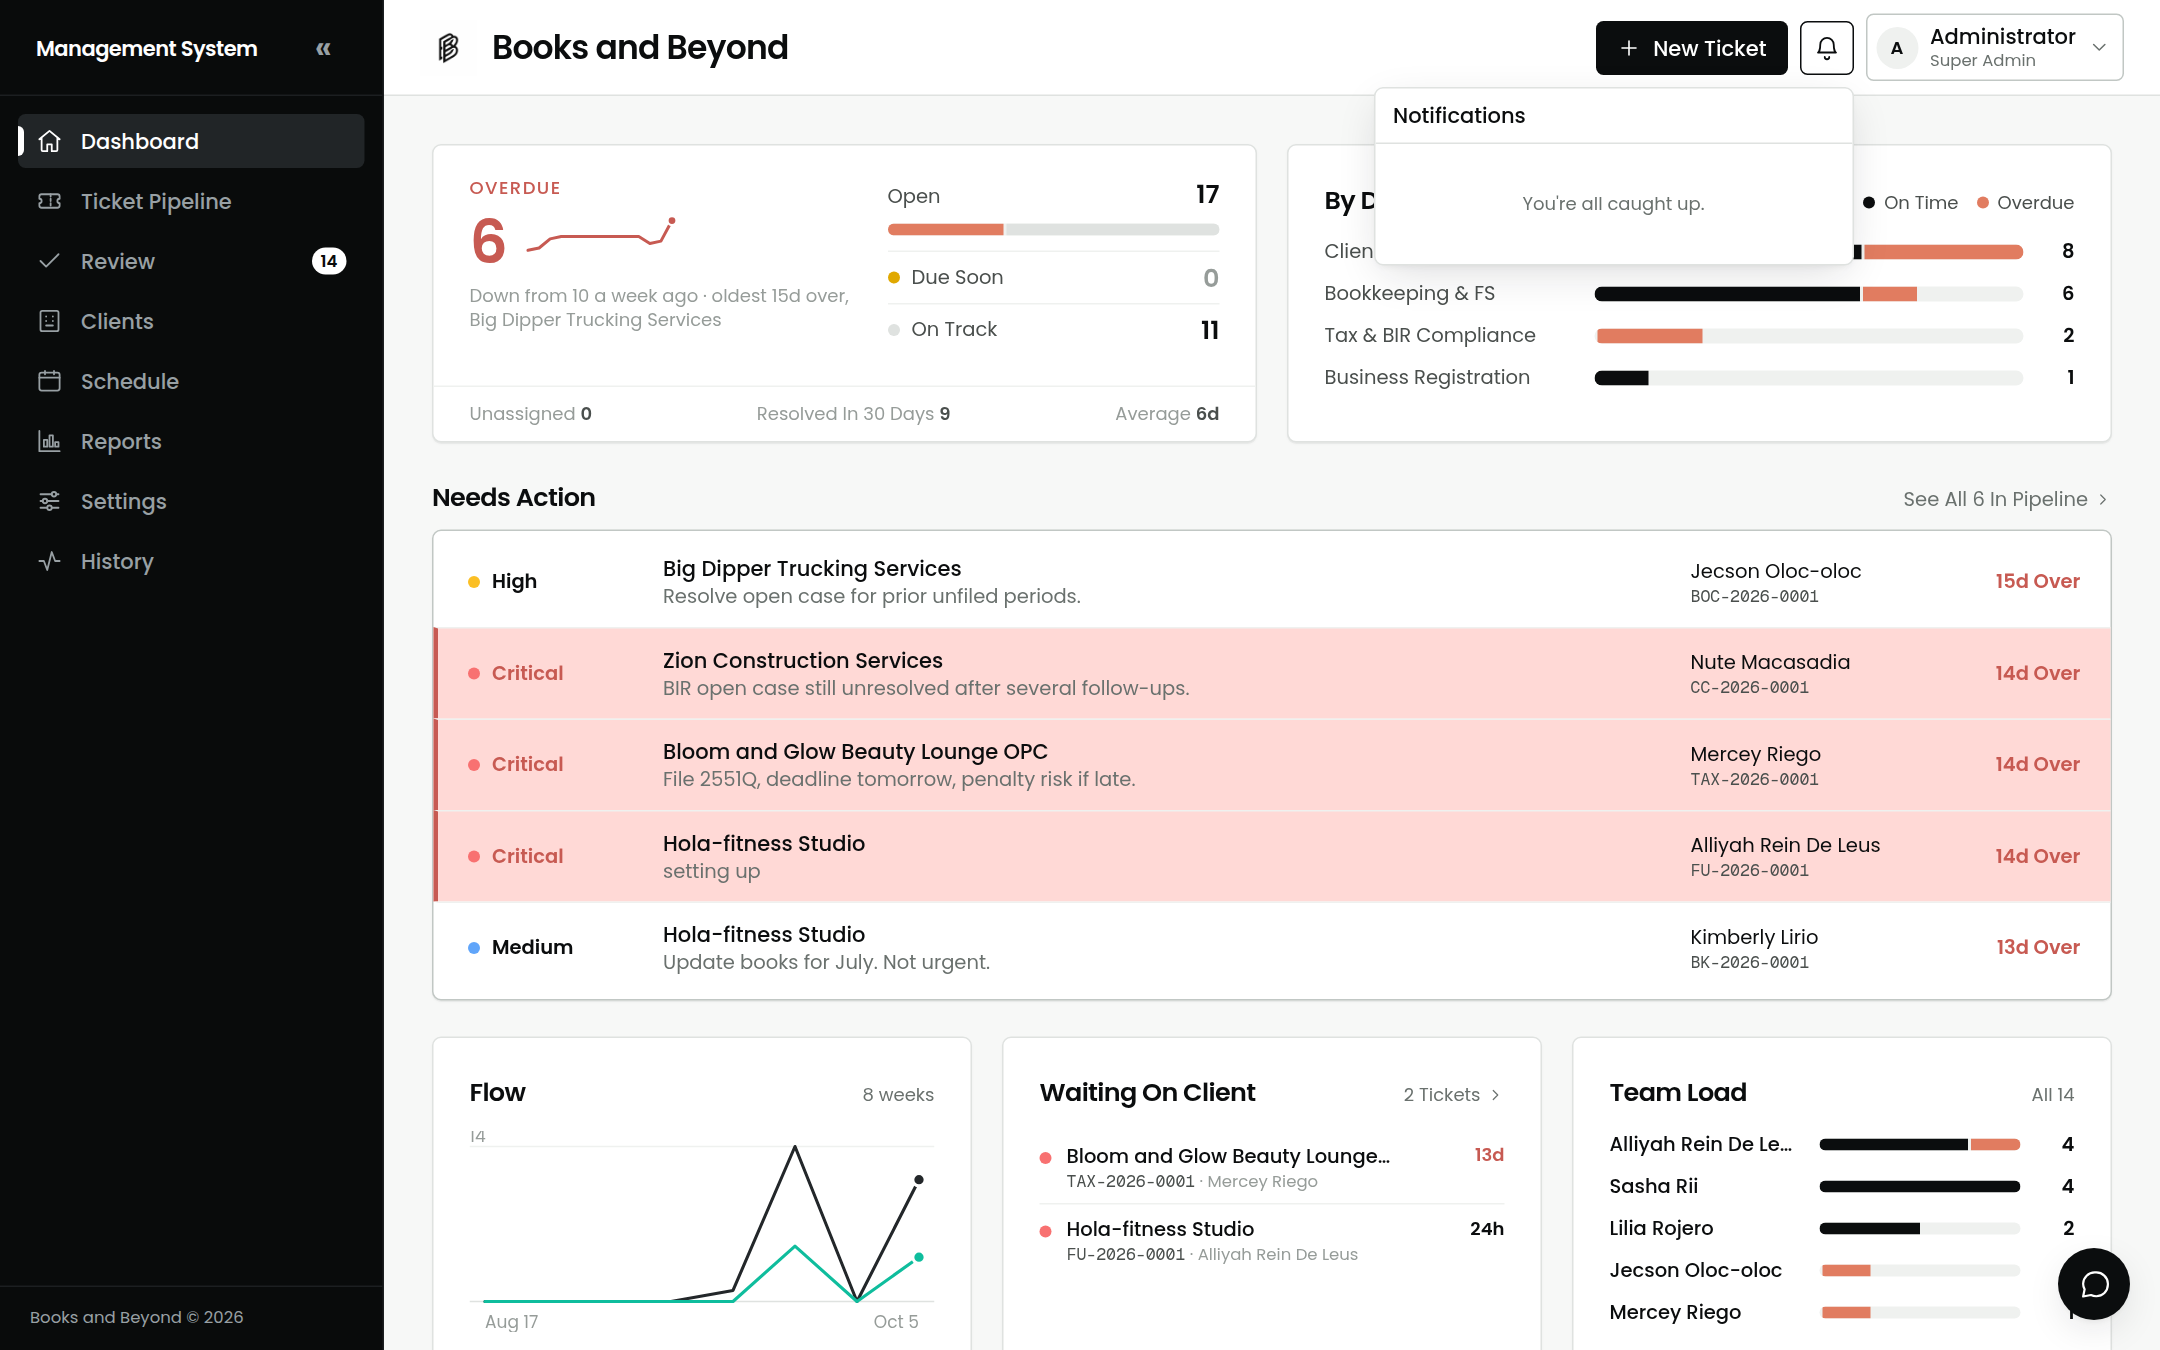
Your landing page — a quick read of where things stand. At a glance: how many tickets are overdue, open, and on track; the load per department; a Needs Action queue of what's overdue or due soon (Critical ones stand out in red); plus Flow over time, who's Waiting On Client, and Team Load.
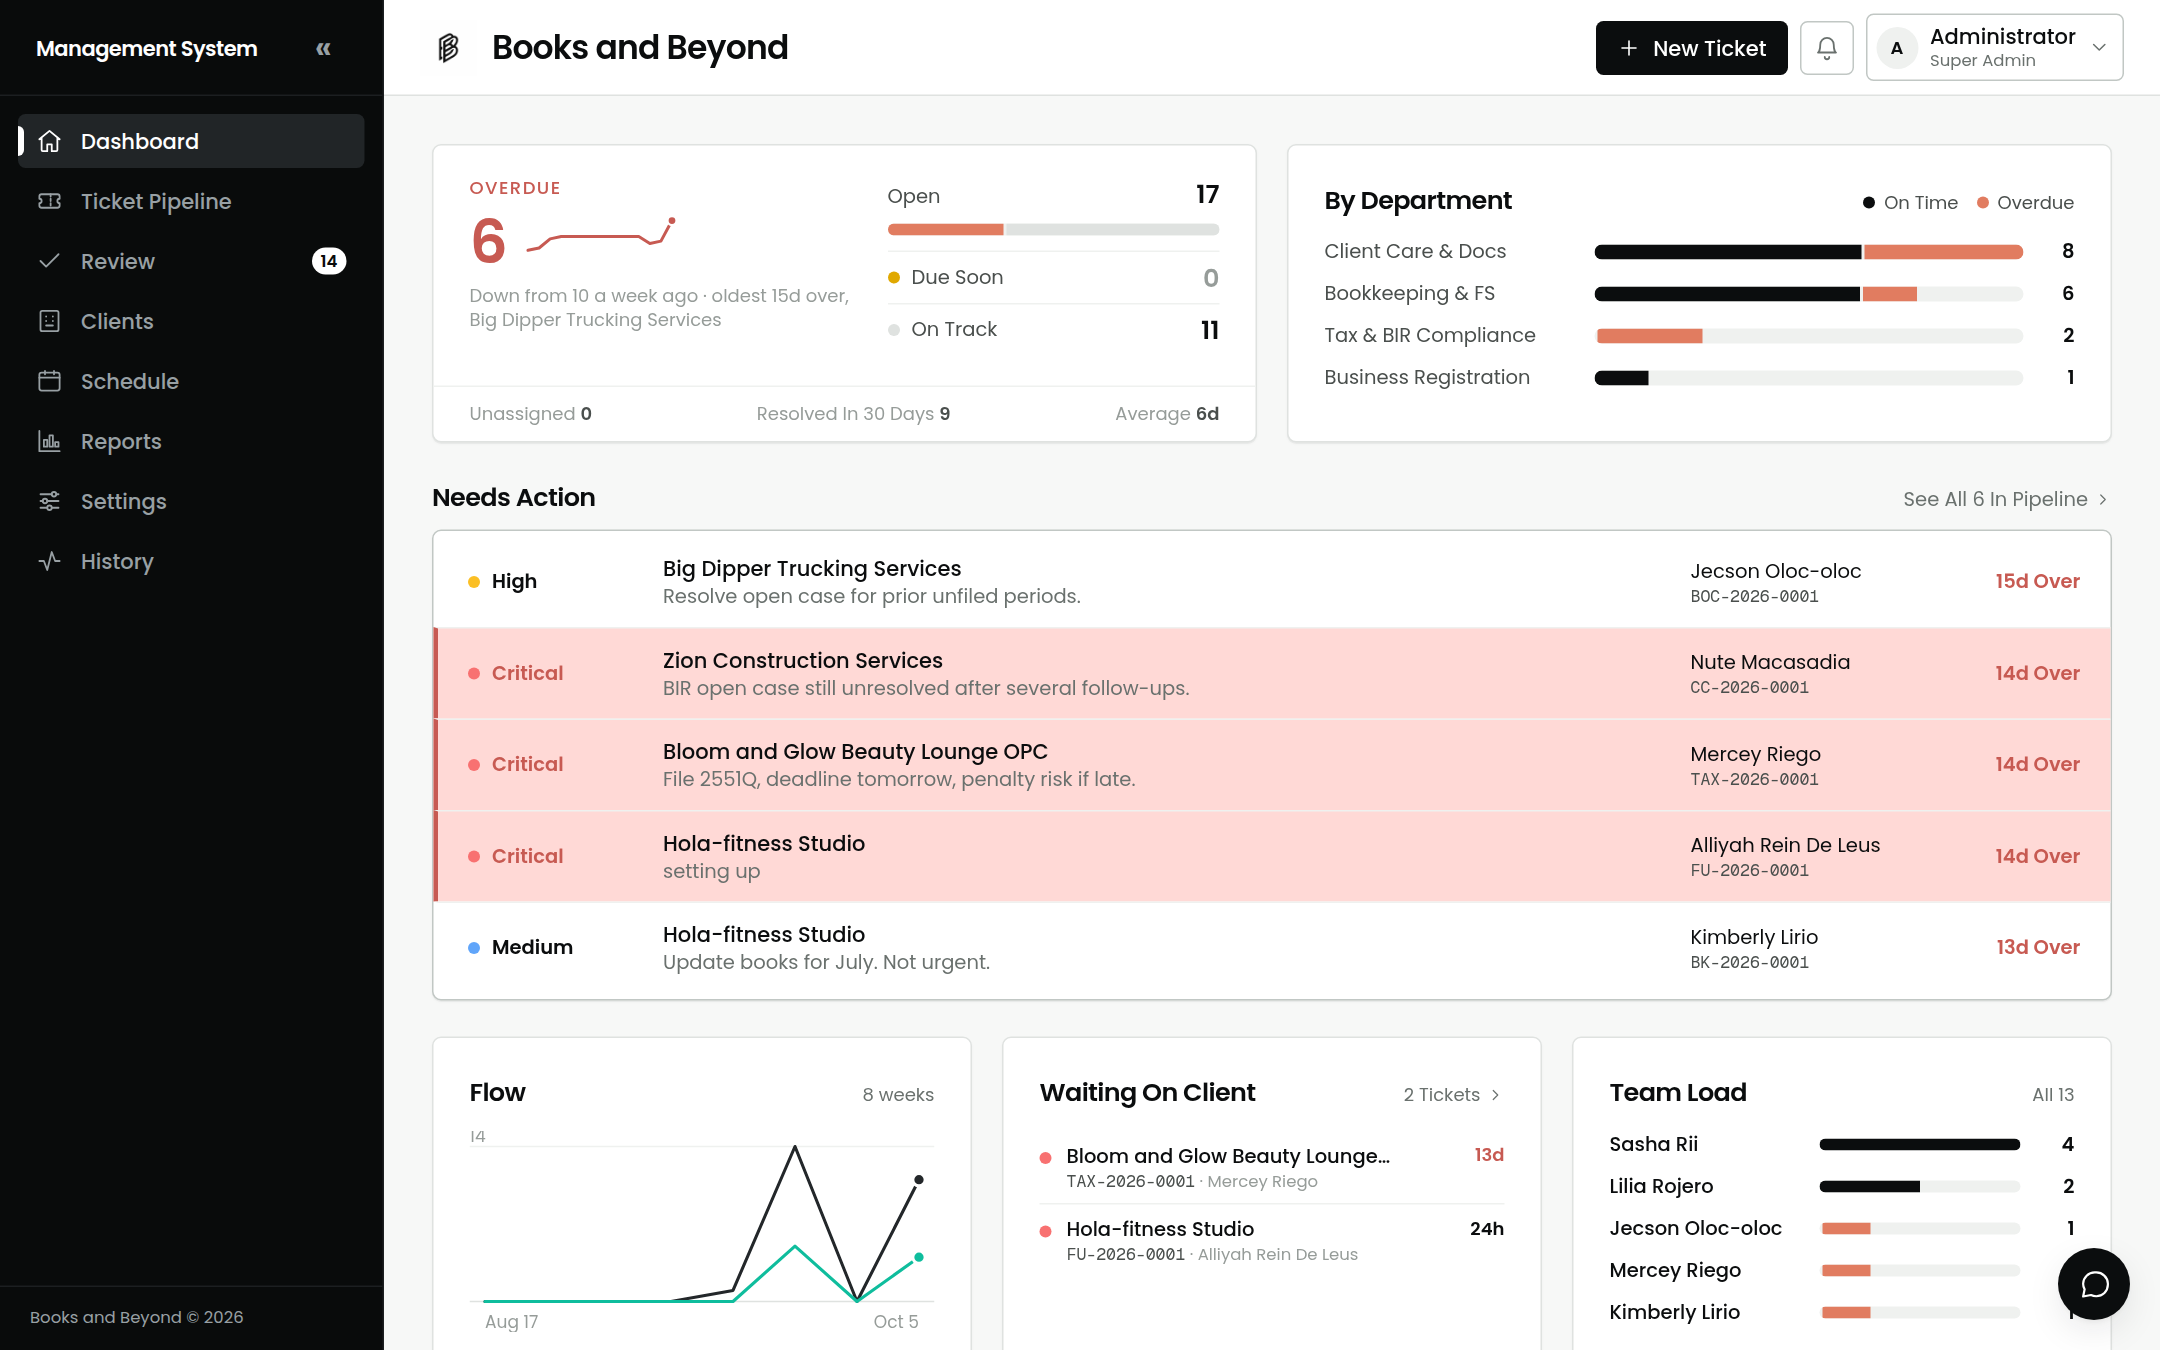
A plain staffer sees only their own figures; reviewers and admins see the whole team.
4.Ticket Pipeline
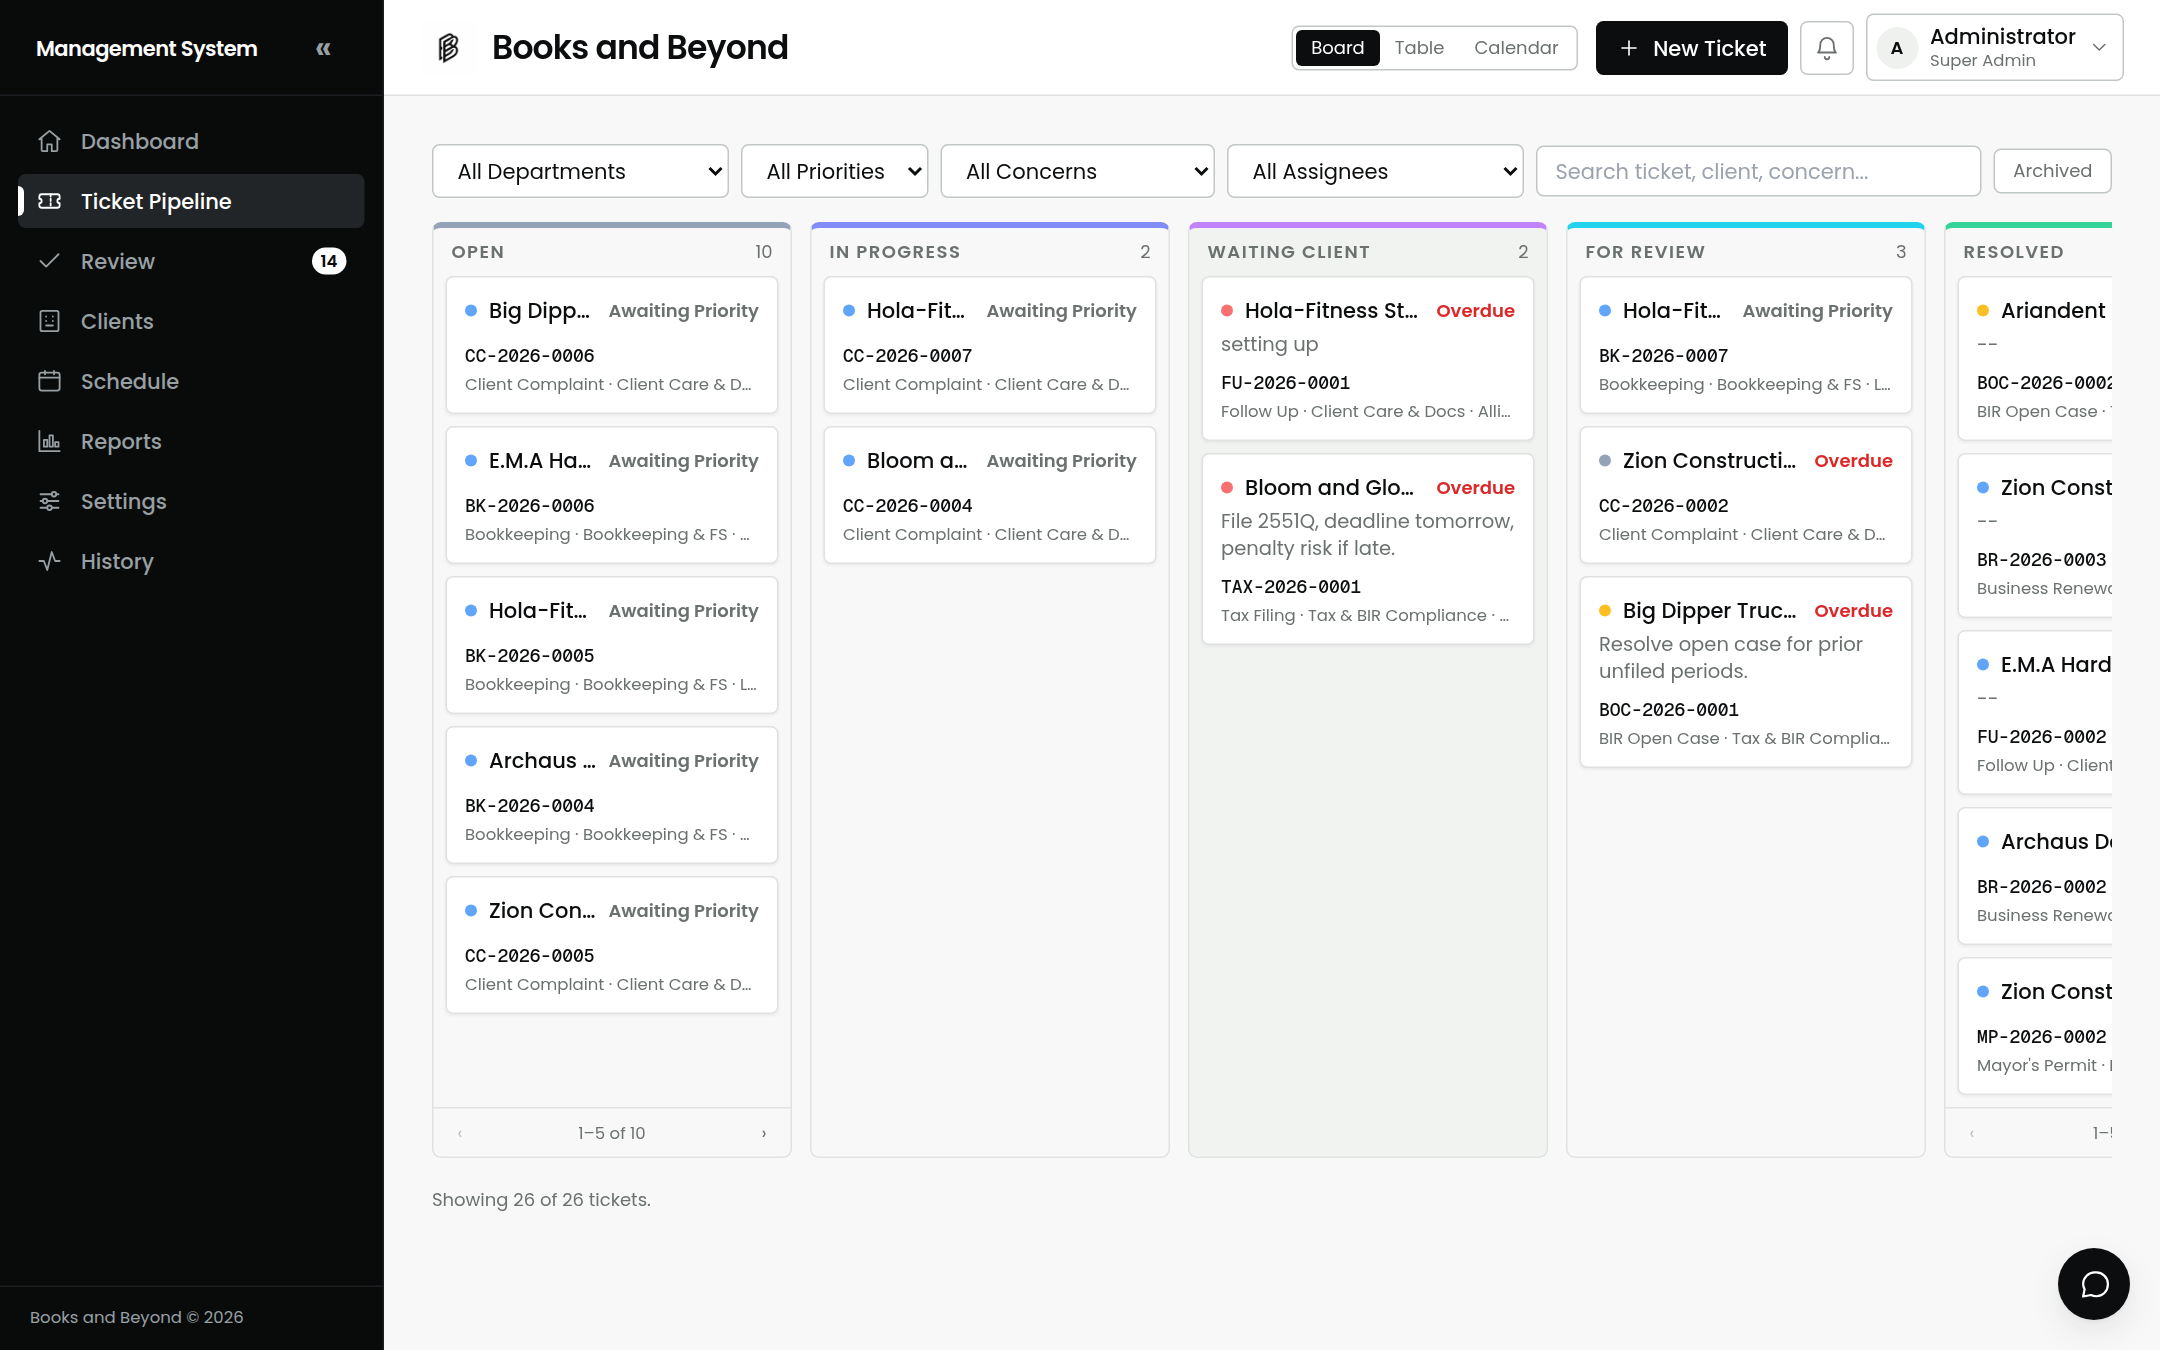
The working board. Tickets sit in columns by status; drag a card to move it (you'll be asked for a note and a proof photo). Switch between Board, Table, and Calendar views from the top right, and filter by department, priority, concern, assignee, or a quick filter like Overdue or Needs Attention.
5.Creating a ticket
A ticket can start in two places — a staff member raises it in the console, or a client submits it through their portal link. Either way it enters the same pipeline, lands in the reviewer's Set Priority queue, and auto-assigns to the right desk.
From the staff console
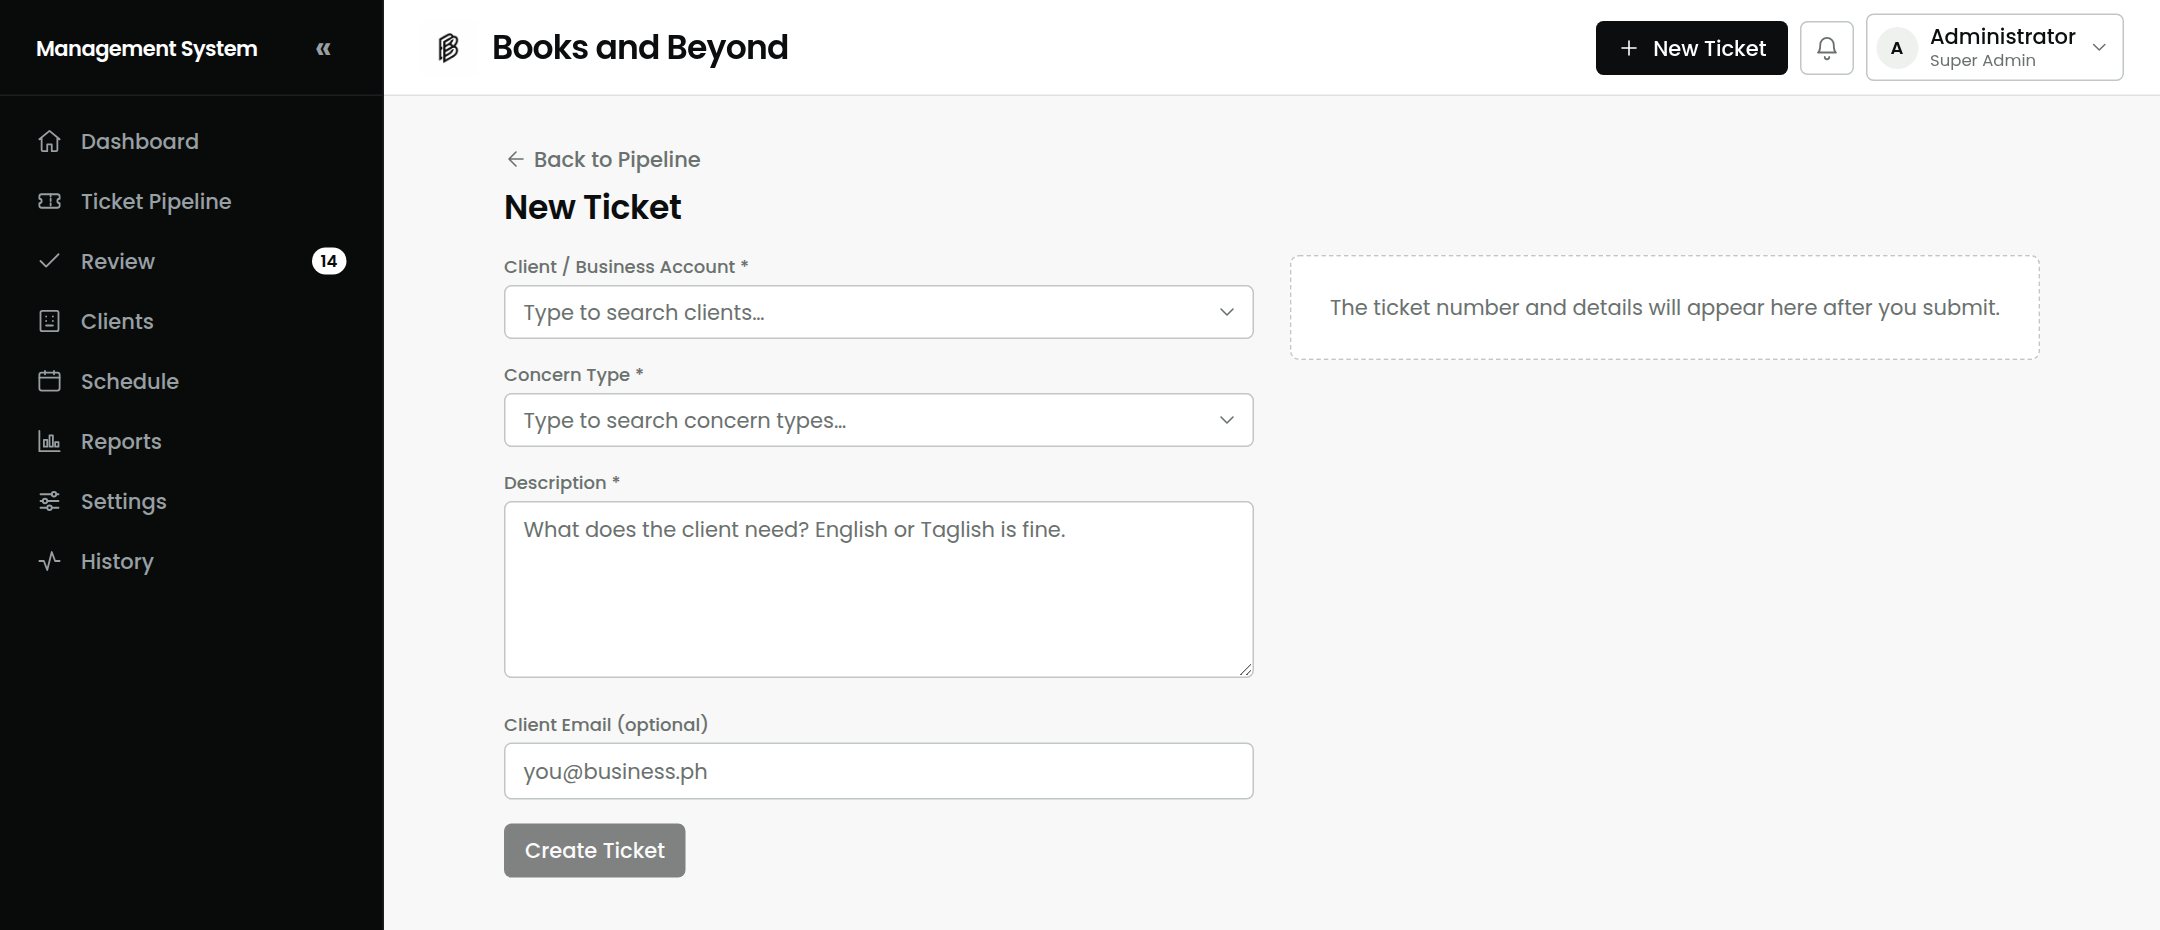
Click + New Ticket in the top bar (available on any screen), then fill in:
- Client / Business Account — start typing to find the client or branch. For someone not yet on the roster, pick + Other / New Business and type the name.
- Concern Type — what the request is about; this decides the department.
- Description — what the client needs, in English or Taglish.
- Client Email — optional.
Press Create Ticket. The new ticket's number appears on the right, and it goes straight to the reviewer to set a priority — nothing guesses a priority or deadline.
From the client portal
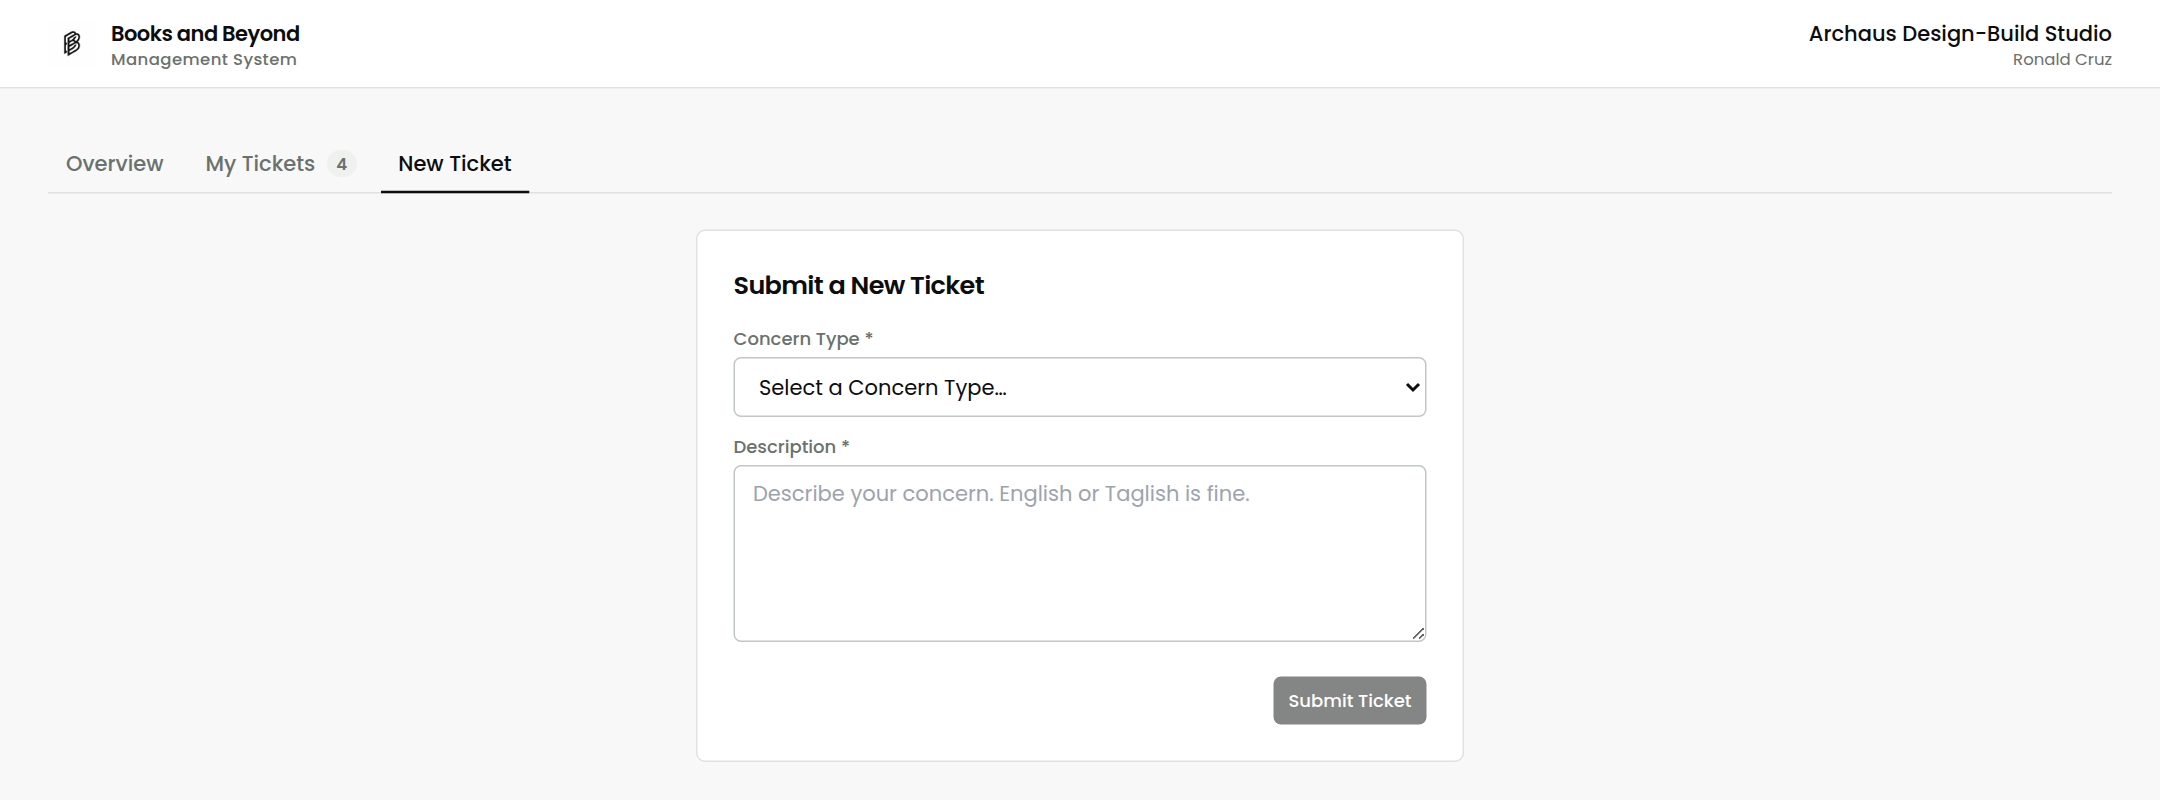
On their portal link, the client opens the New Ticket tab (or taps + Submit a Ticket on the overview) and gives just two things:
- Concern Type — chosen from a list.
- Description — what they need.
They press Submit Ticket and see their new ticket number right away. Their business details are filled in automatically from their link, so they never re-enter them.
6.Working a ticket
Click any ticket to open its detail panel on the right. From here you can move its status, add notes, reply to the client, and (for admins) reassign or delete it.
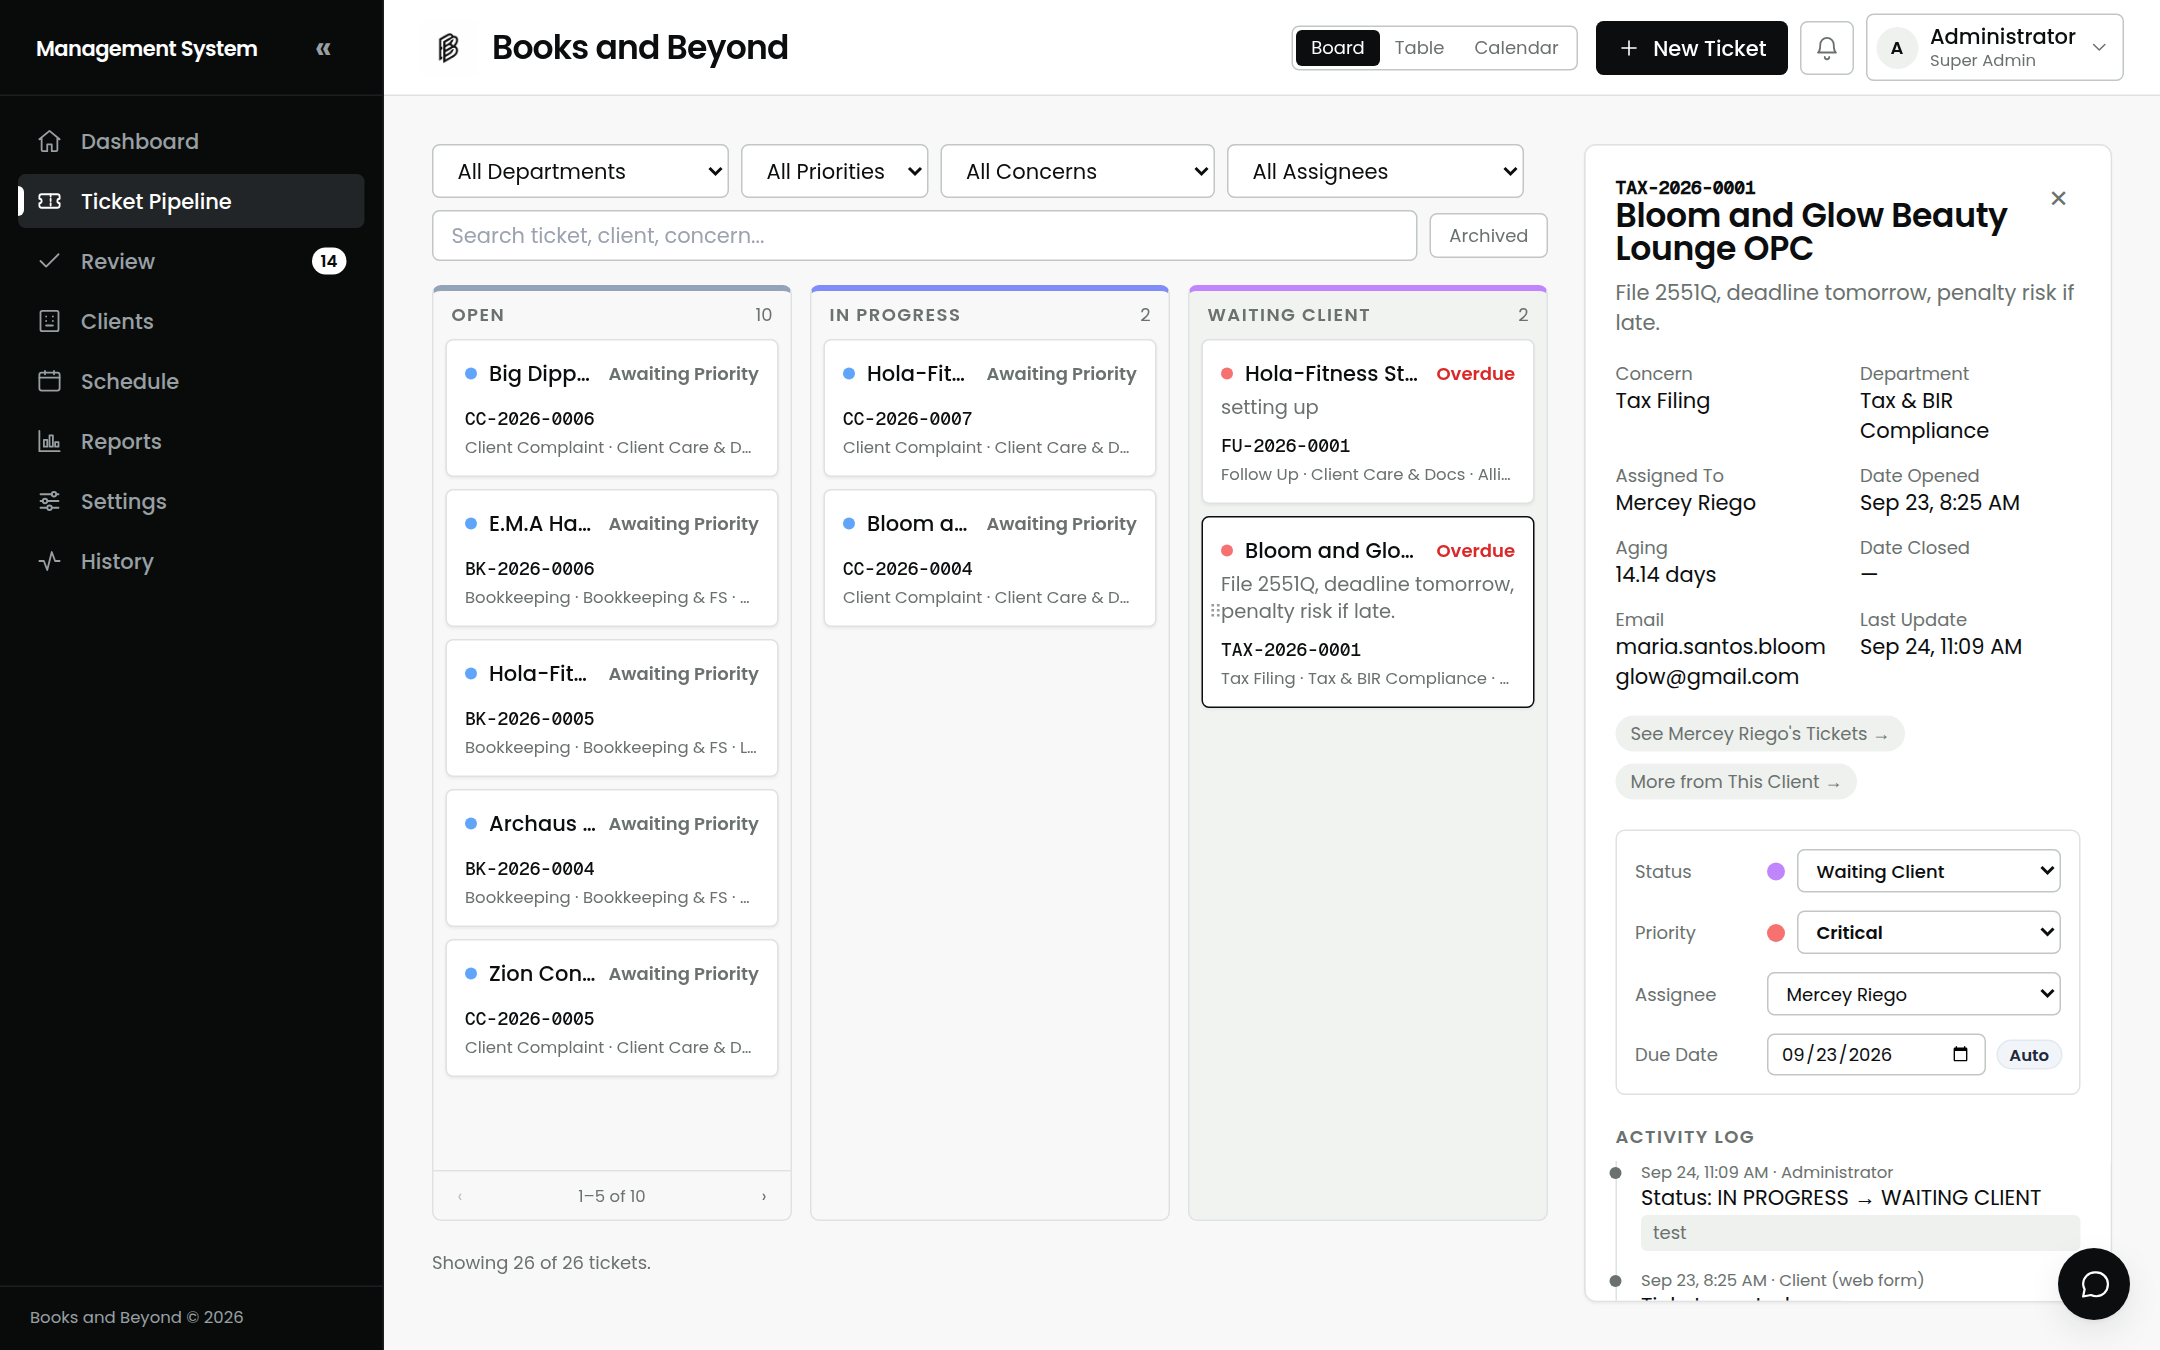
Moving a ticket's status
- Change the Status (or drag the card on the board).
- Add a note describing what you did — it's required and logged with a timestamp.
- Attach a proof photo of the work — also required on every status change.
- Confirm. The move is recorded in the ticket's history.
Handing work up for review
When your work is done, move the ticket to the for-review status. It lands in the reviewer's Resolve Requests queue — only a reviewer or admin can mark it resolved, so no one signs off their own work.
Reassigning & deleting (admins)
- Reassign: use the Assignee dropdown in the detail (shows only people who handle that department).
- Delete: the Delete Ticket button at the bottom. It's a soft delete — the ticket is hidden everywhere but kept, and can be restored from Archived.
7.Review queue
For reviewers and admins. Two piles: Set Priority — new tickets still awaiting judgment (nothing guesses a priority; a human sets it) — and Resolve Requests — tickets staff have handed up to be signed off.
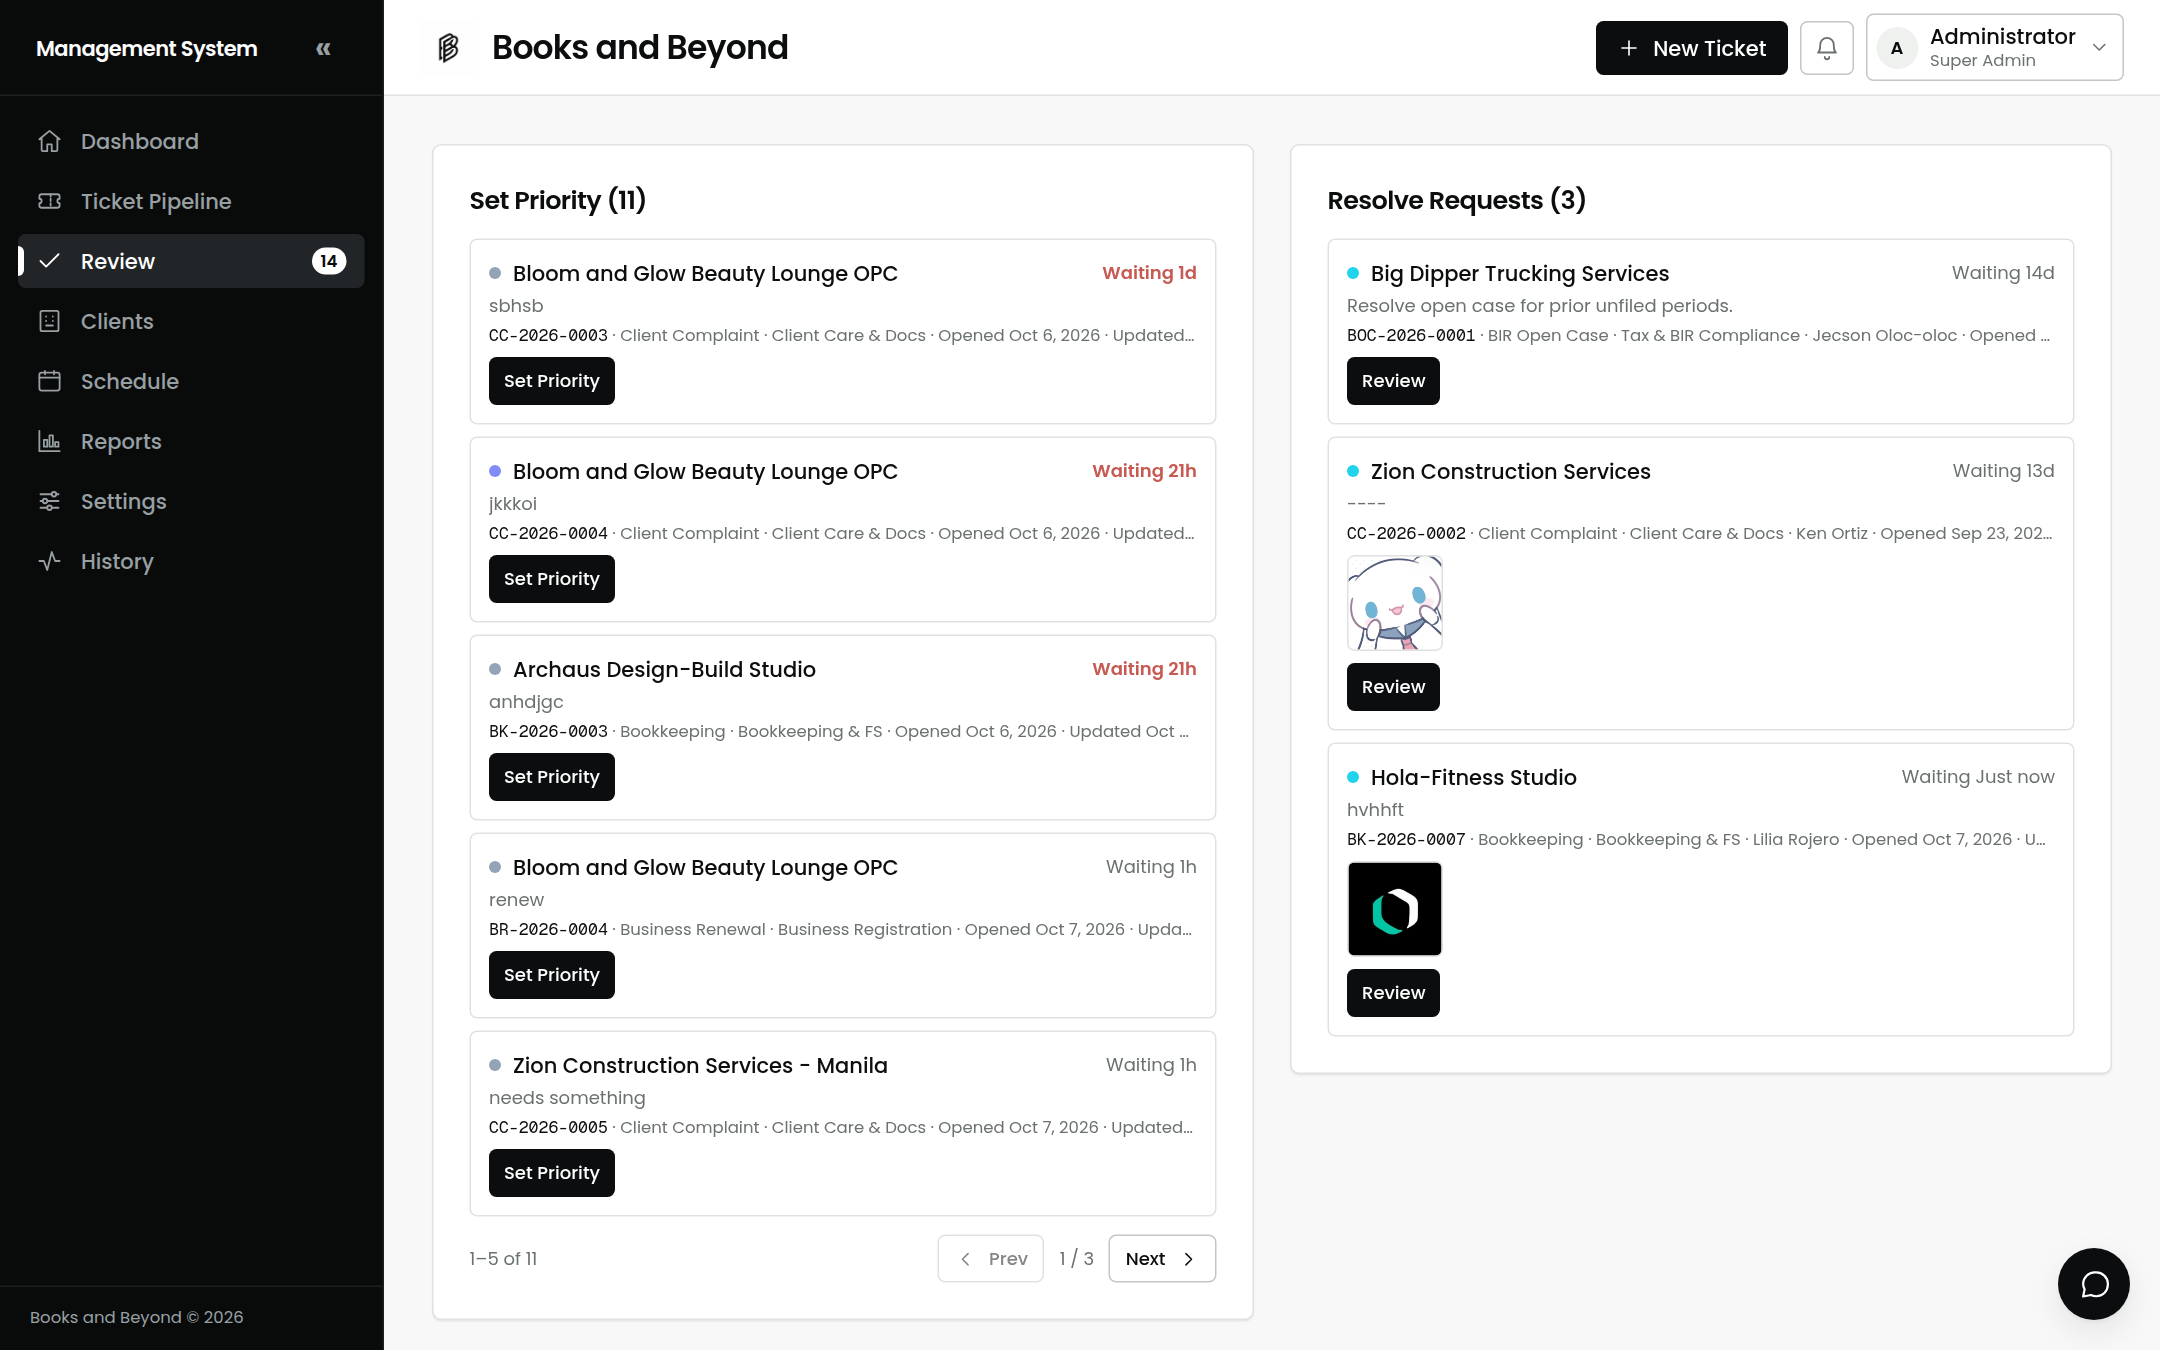
Setting a priority also writes the one-line summary and starts the deadline clock from that moment — so the firm is never held to a clock that ran while no one had looked.
8.Clients & portal links
The client roster. Each client is a business (with its TIN); a business with several locations has branches, each with its own TIN, address, and RDO. Every branch has its own member with a private Portal Access link.
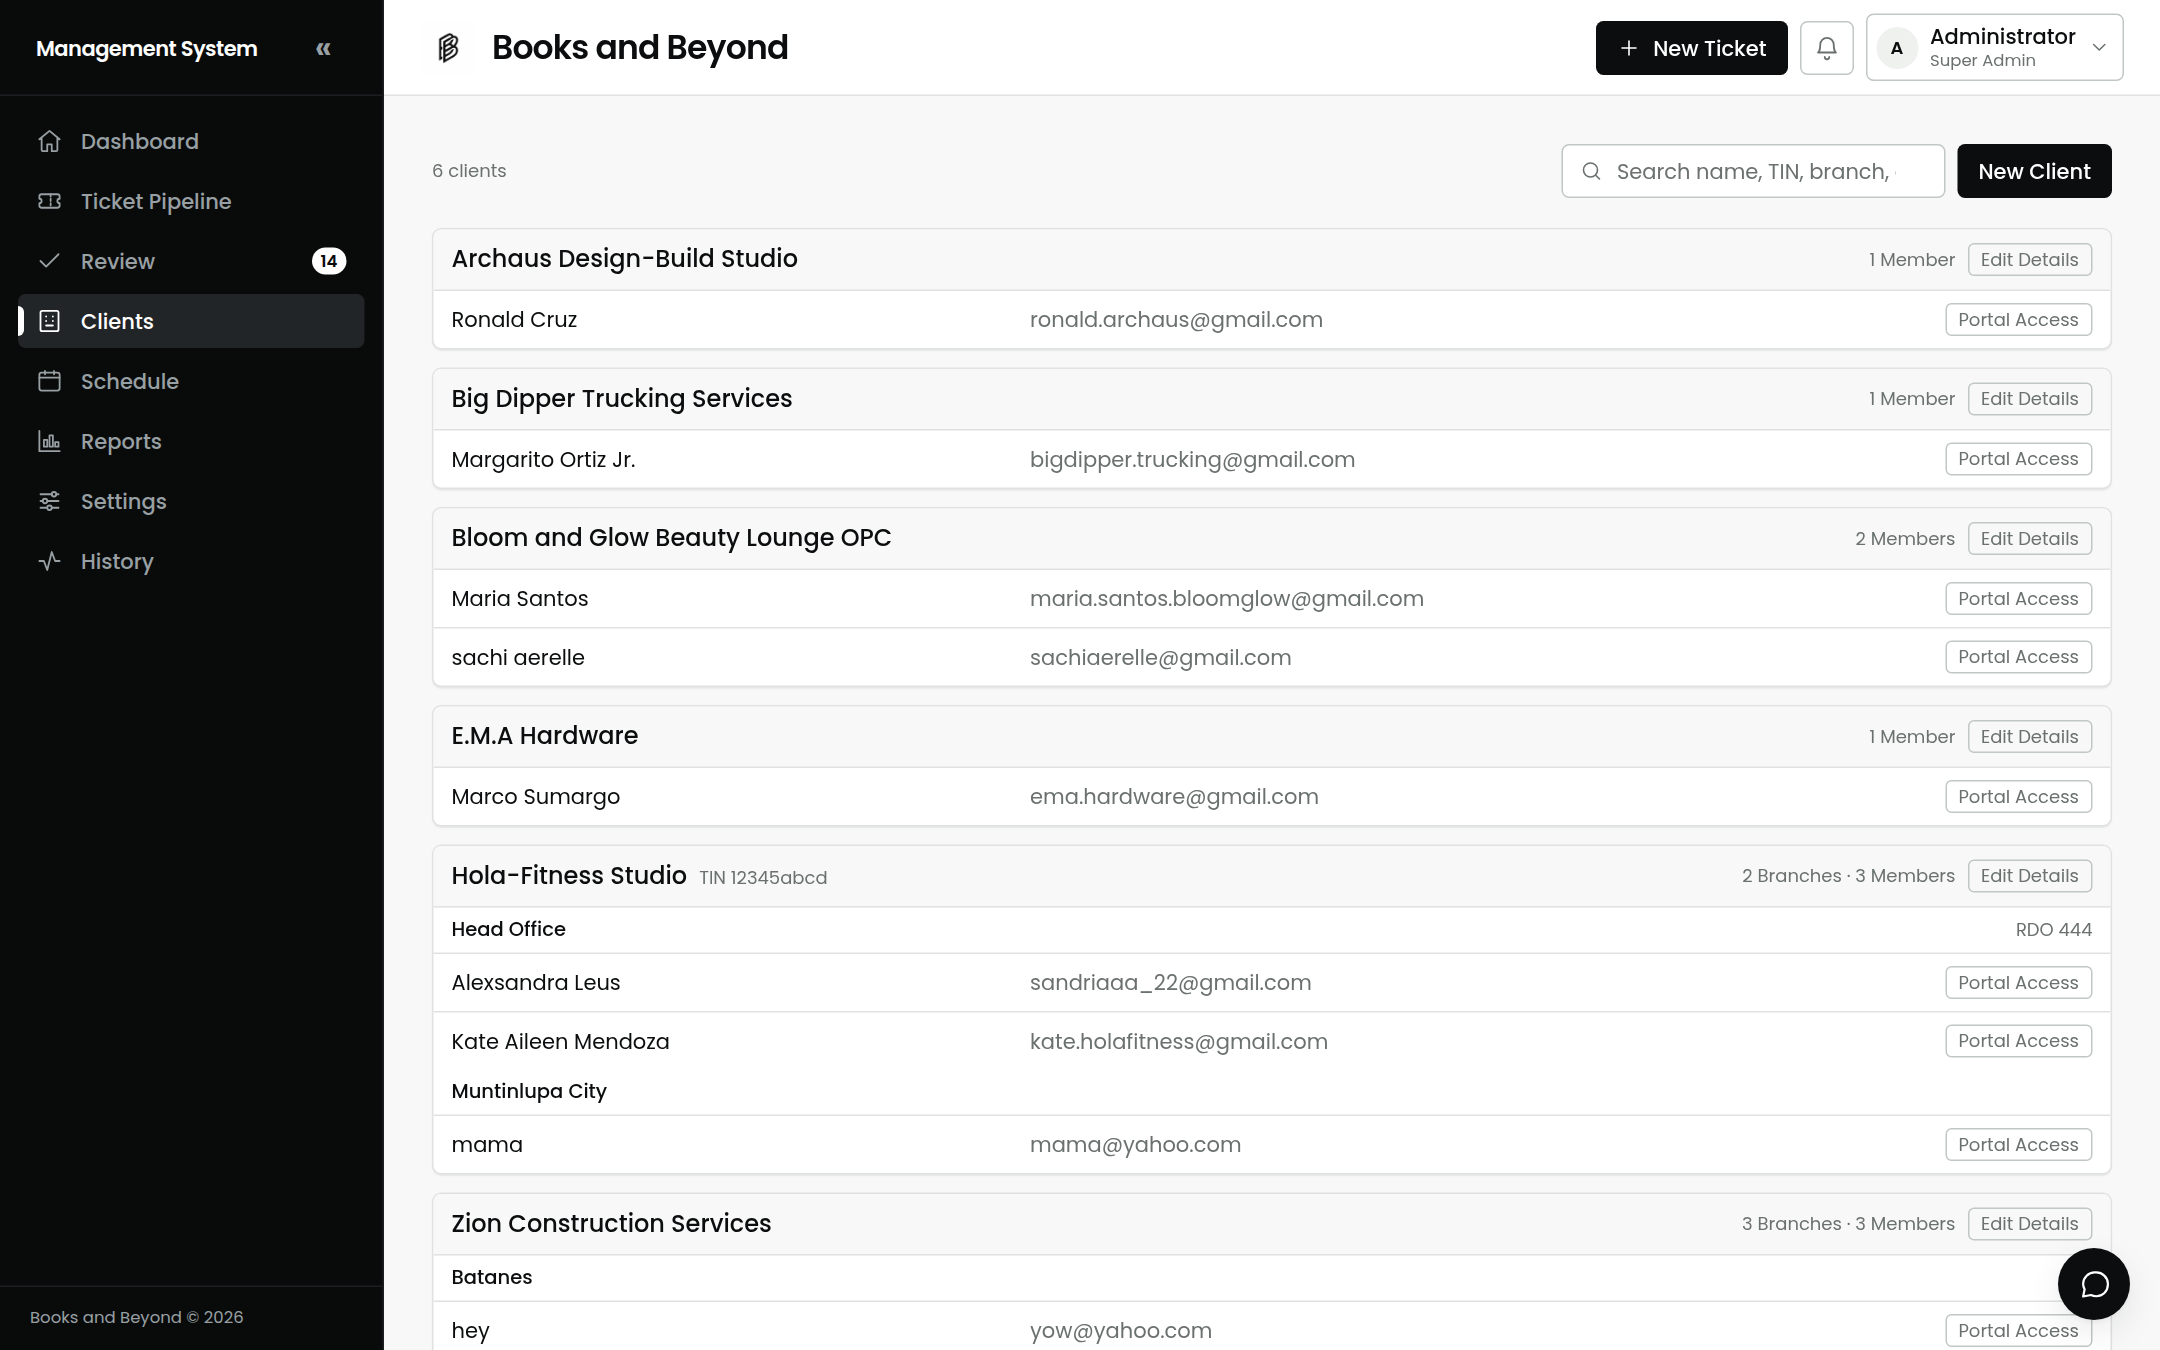
- New Client (top right) enrolls a company, its branches, and members.
- Portal Access on a member shows their magic link and QR code to hand over.
- Clients never log in — the magic link is their whole way in. If one is ever compromised, rotate it to kill the old one instantly.
9.Team & Roles
For admins — enroll staff and set their role and department. Open Settings and find the Team & Roles section.
- Enroll a person with a name, email, password, role, and department.
- Role: Staff, Reviewer, Admin, or Super Admin (the elevated roles only appear to a Super Admin).
- All Departments: you can set a staffer to handle every department's tickets, not just one. Reviewers and admins already span all departments.
- Set Password: reset anyone's password (no current password needed — that's the admin reset).
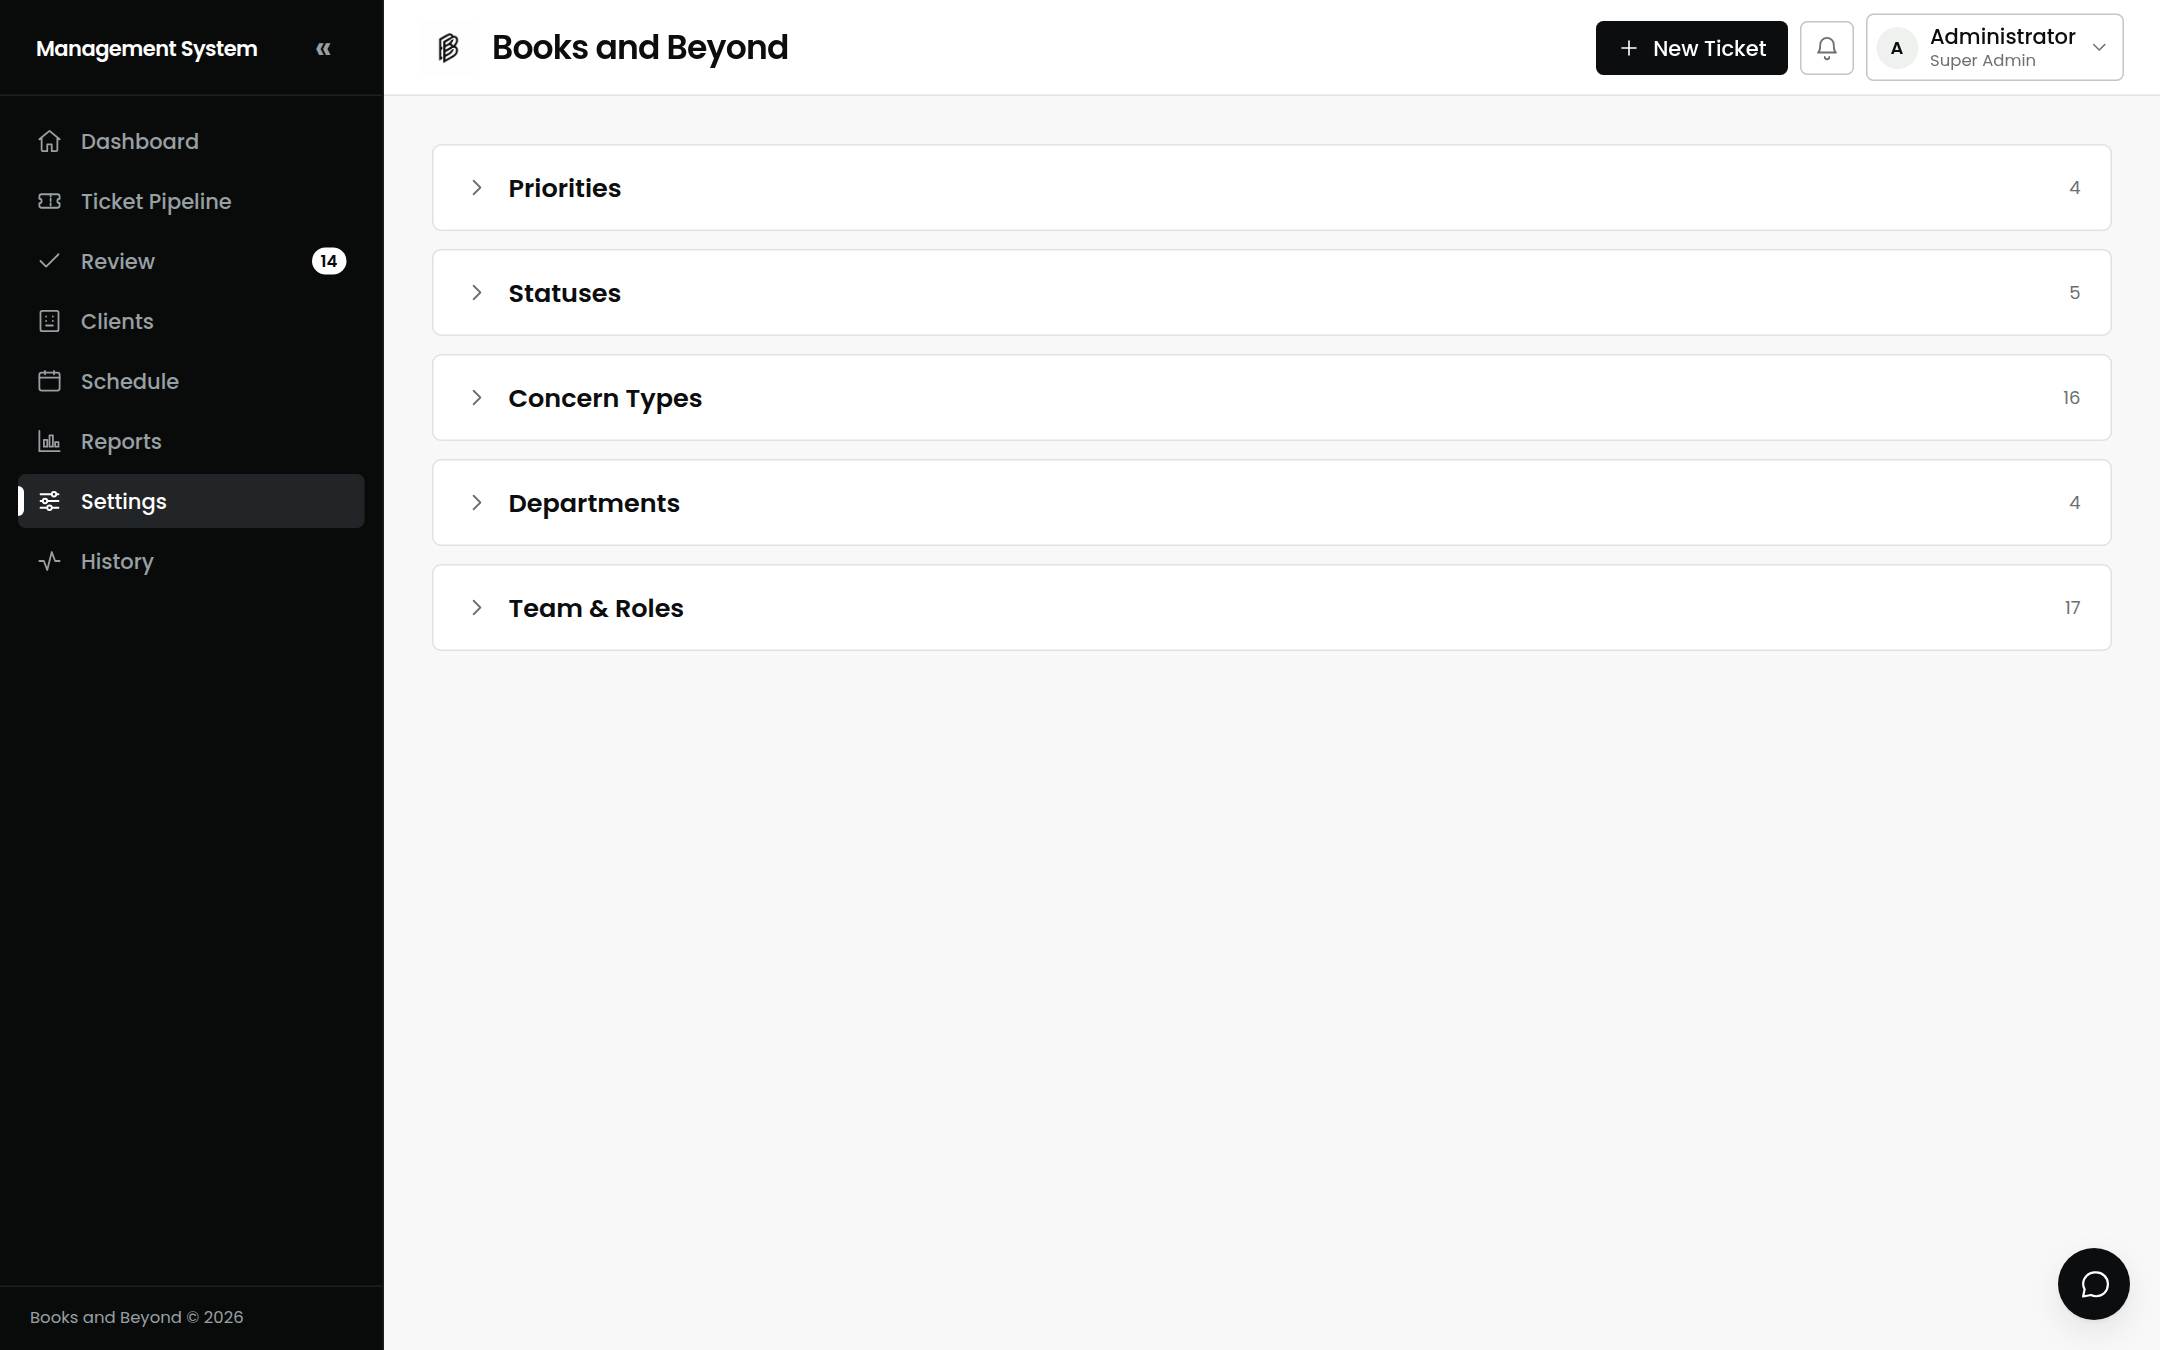
10.Settings
For admins — the rules of the system, editable at runtime (no redeploy). Statuses, priorities (with their SLA hours), concern types, and departments. Change a priority's SLA, rename a status, add a department — it takes effect immediately.
11.Schedule
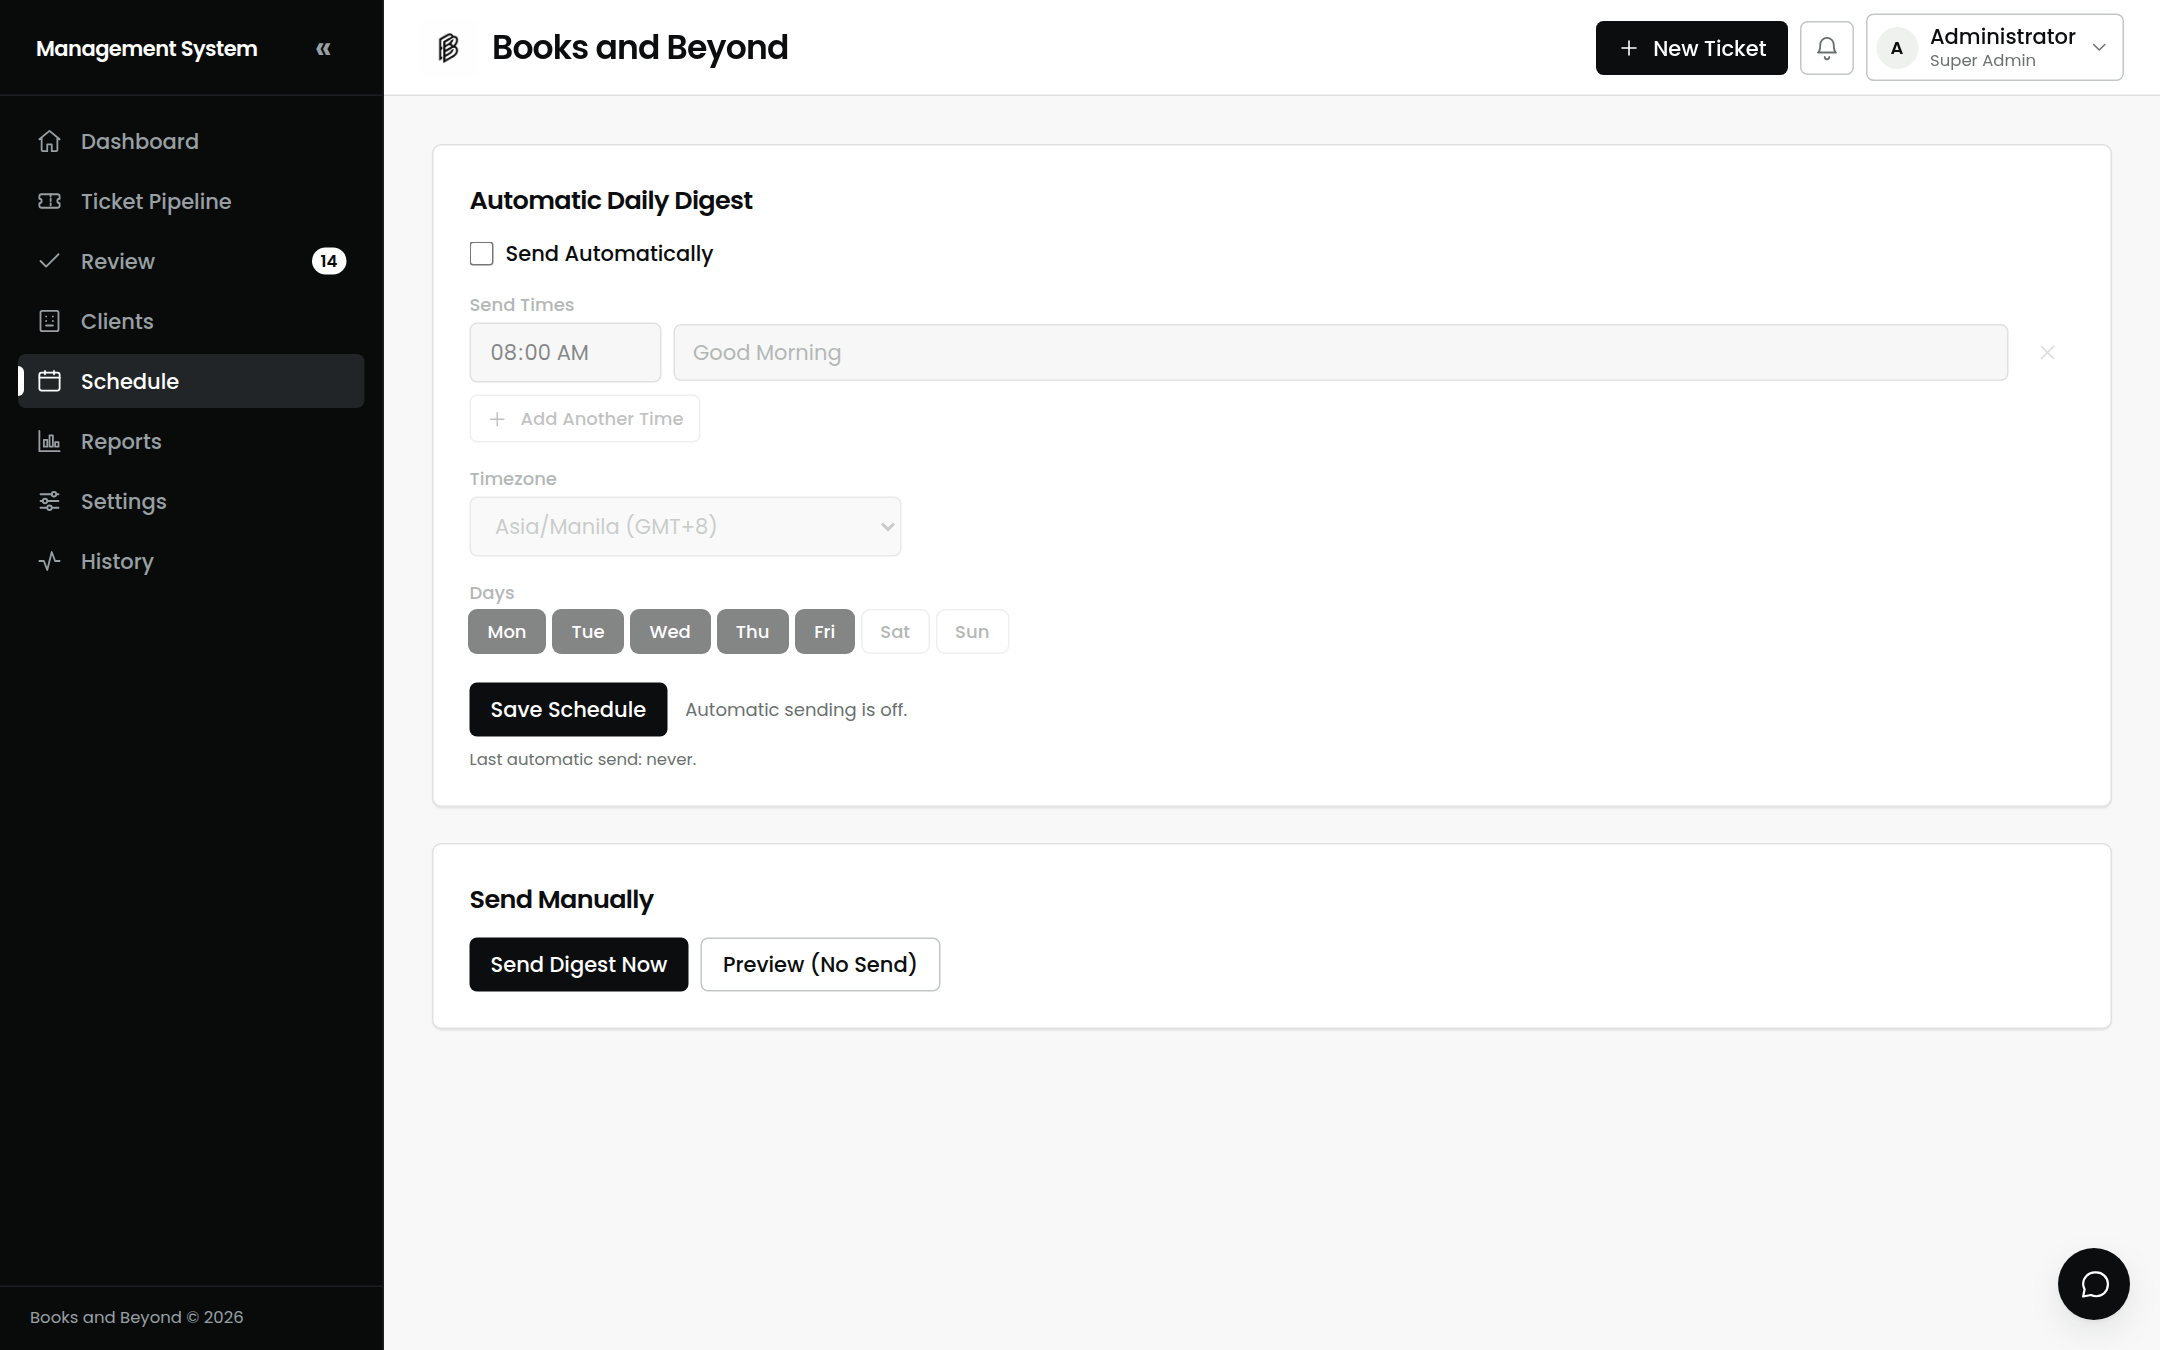
For admins — when the automated daily digest and reports go out. Set the times that work for the team.
12.Reports
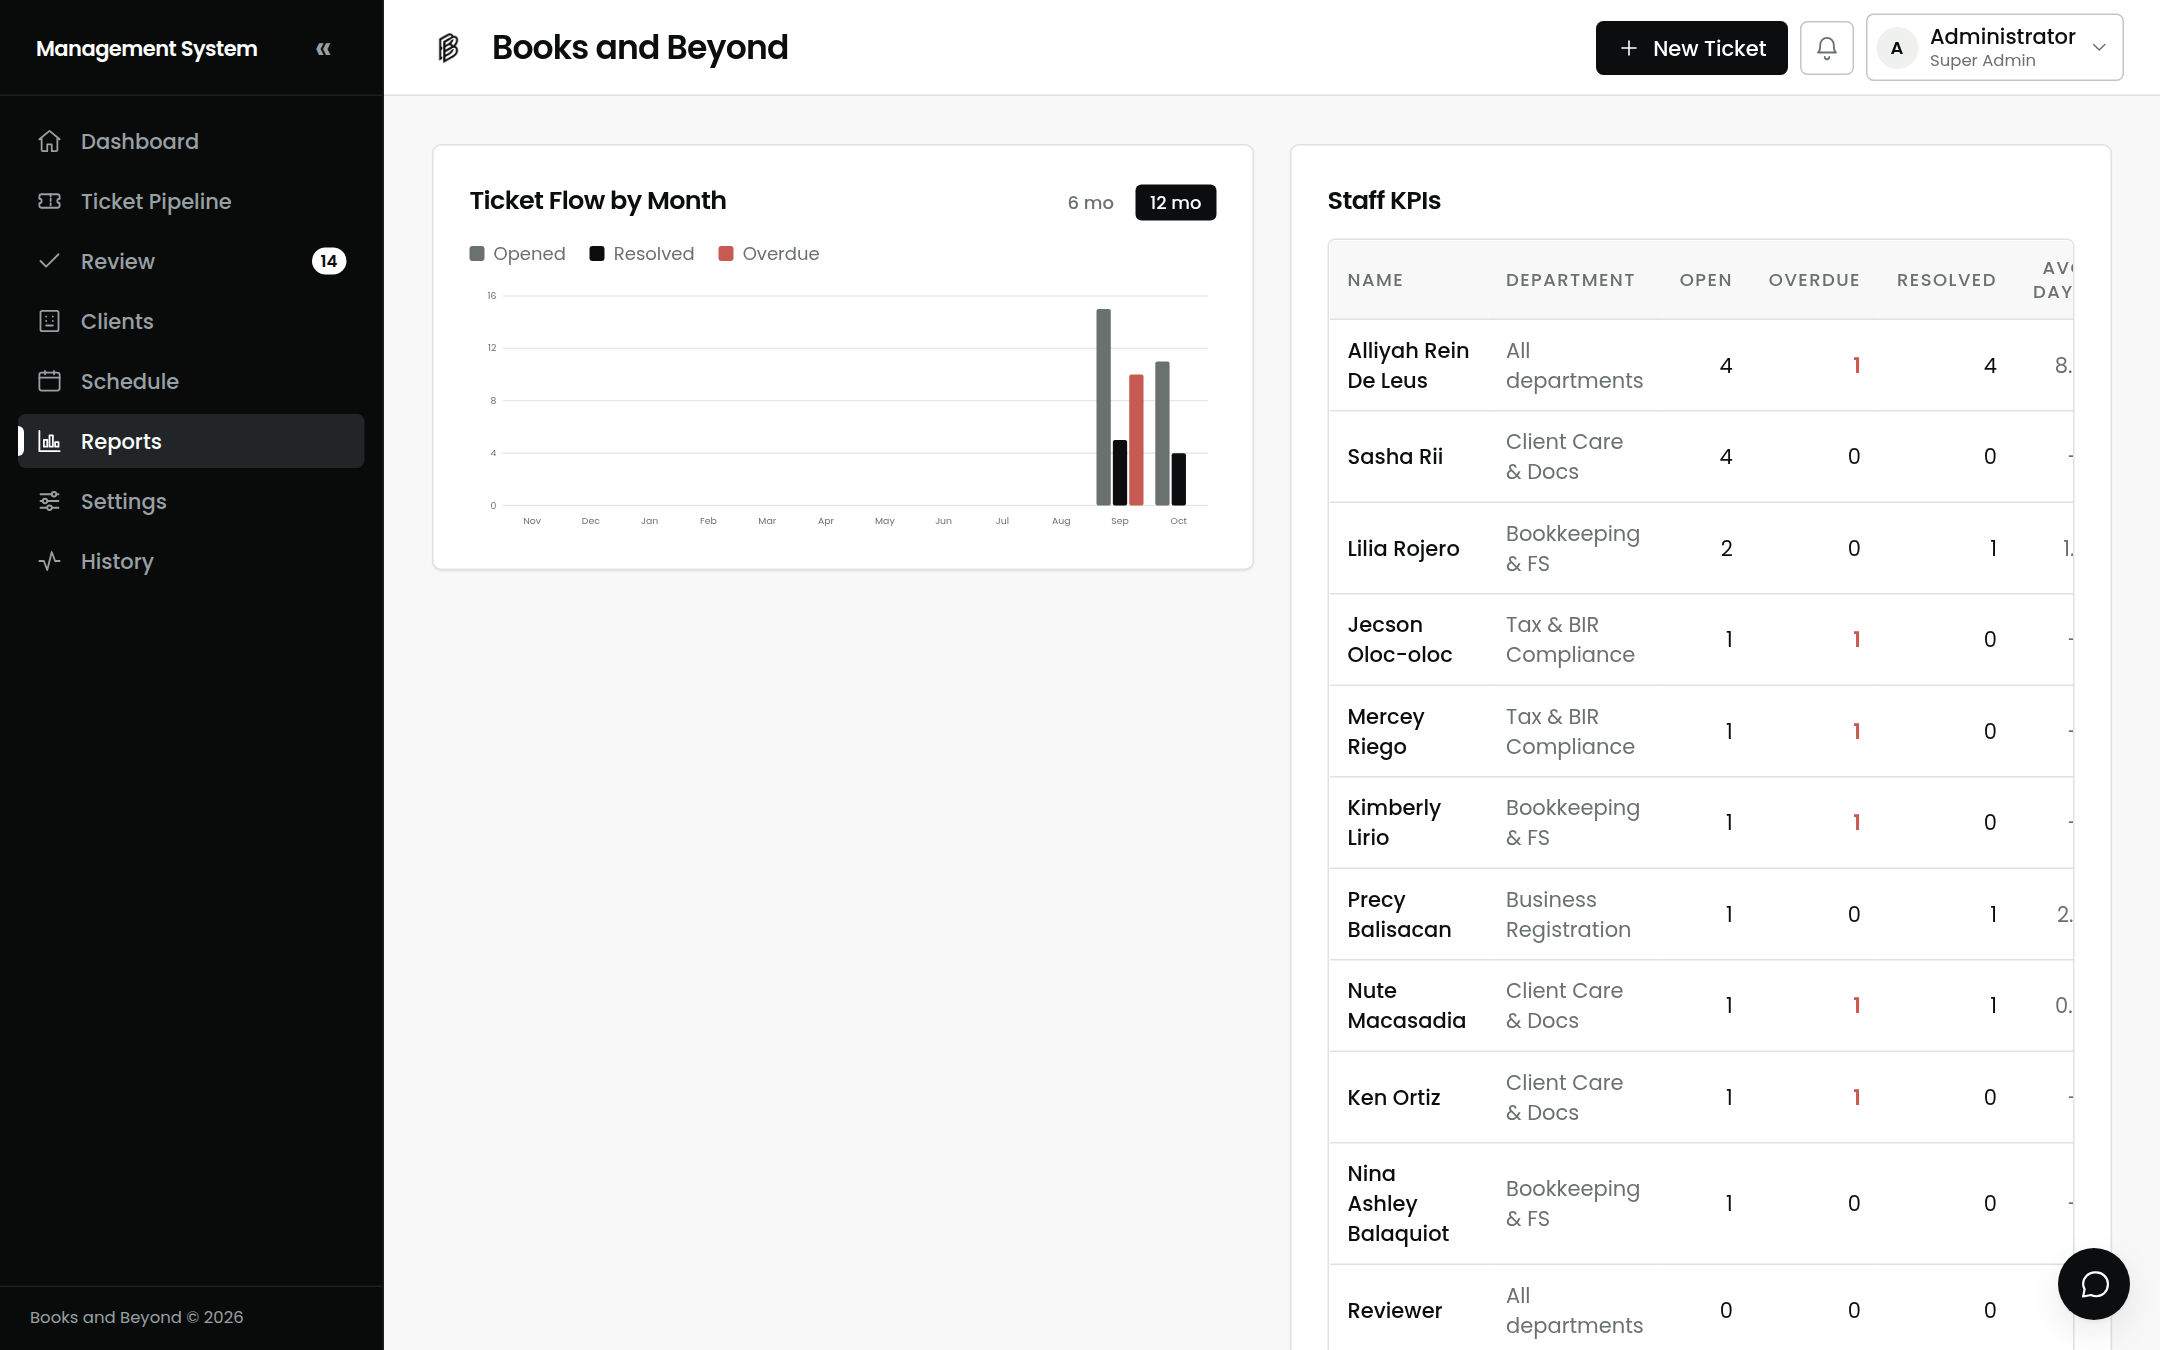
For admins — monthly ticket flow (opened vs. resolved vs. overdue) and per-staff stats (open, overdue, resolved, average days to resolve). Switch between a 6- and 12-month window.
13.Your account
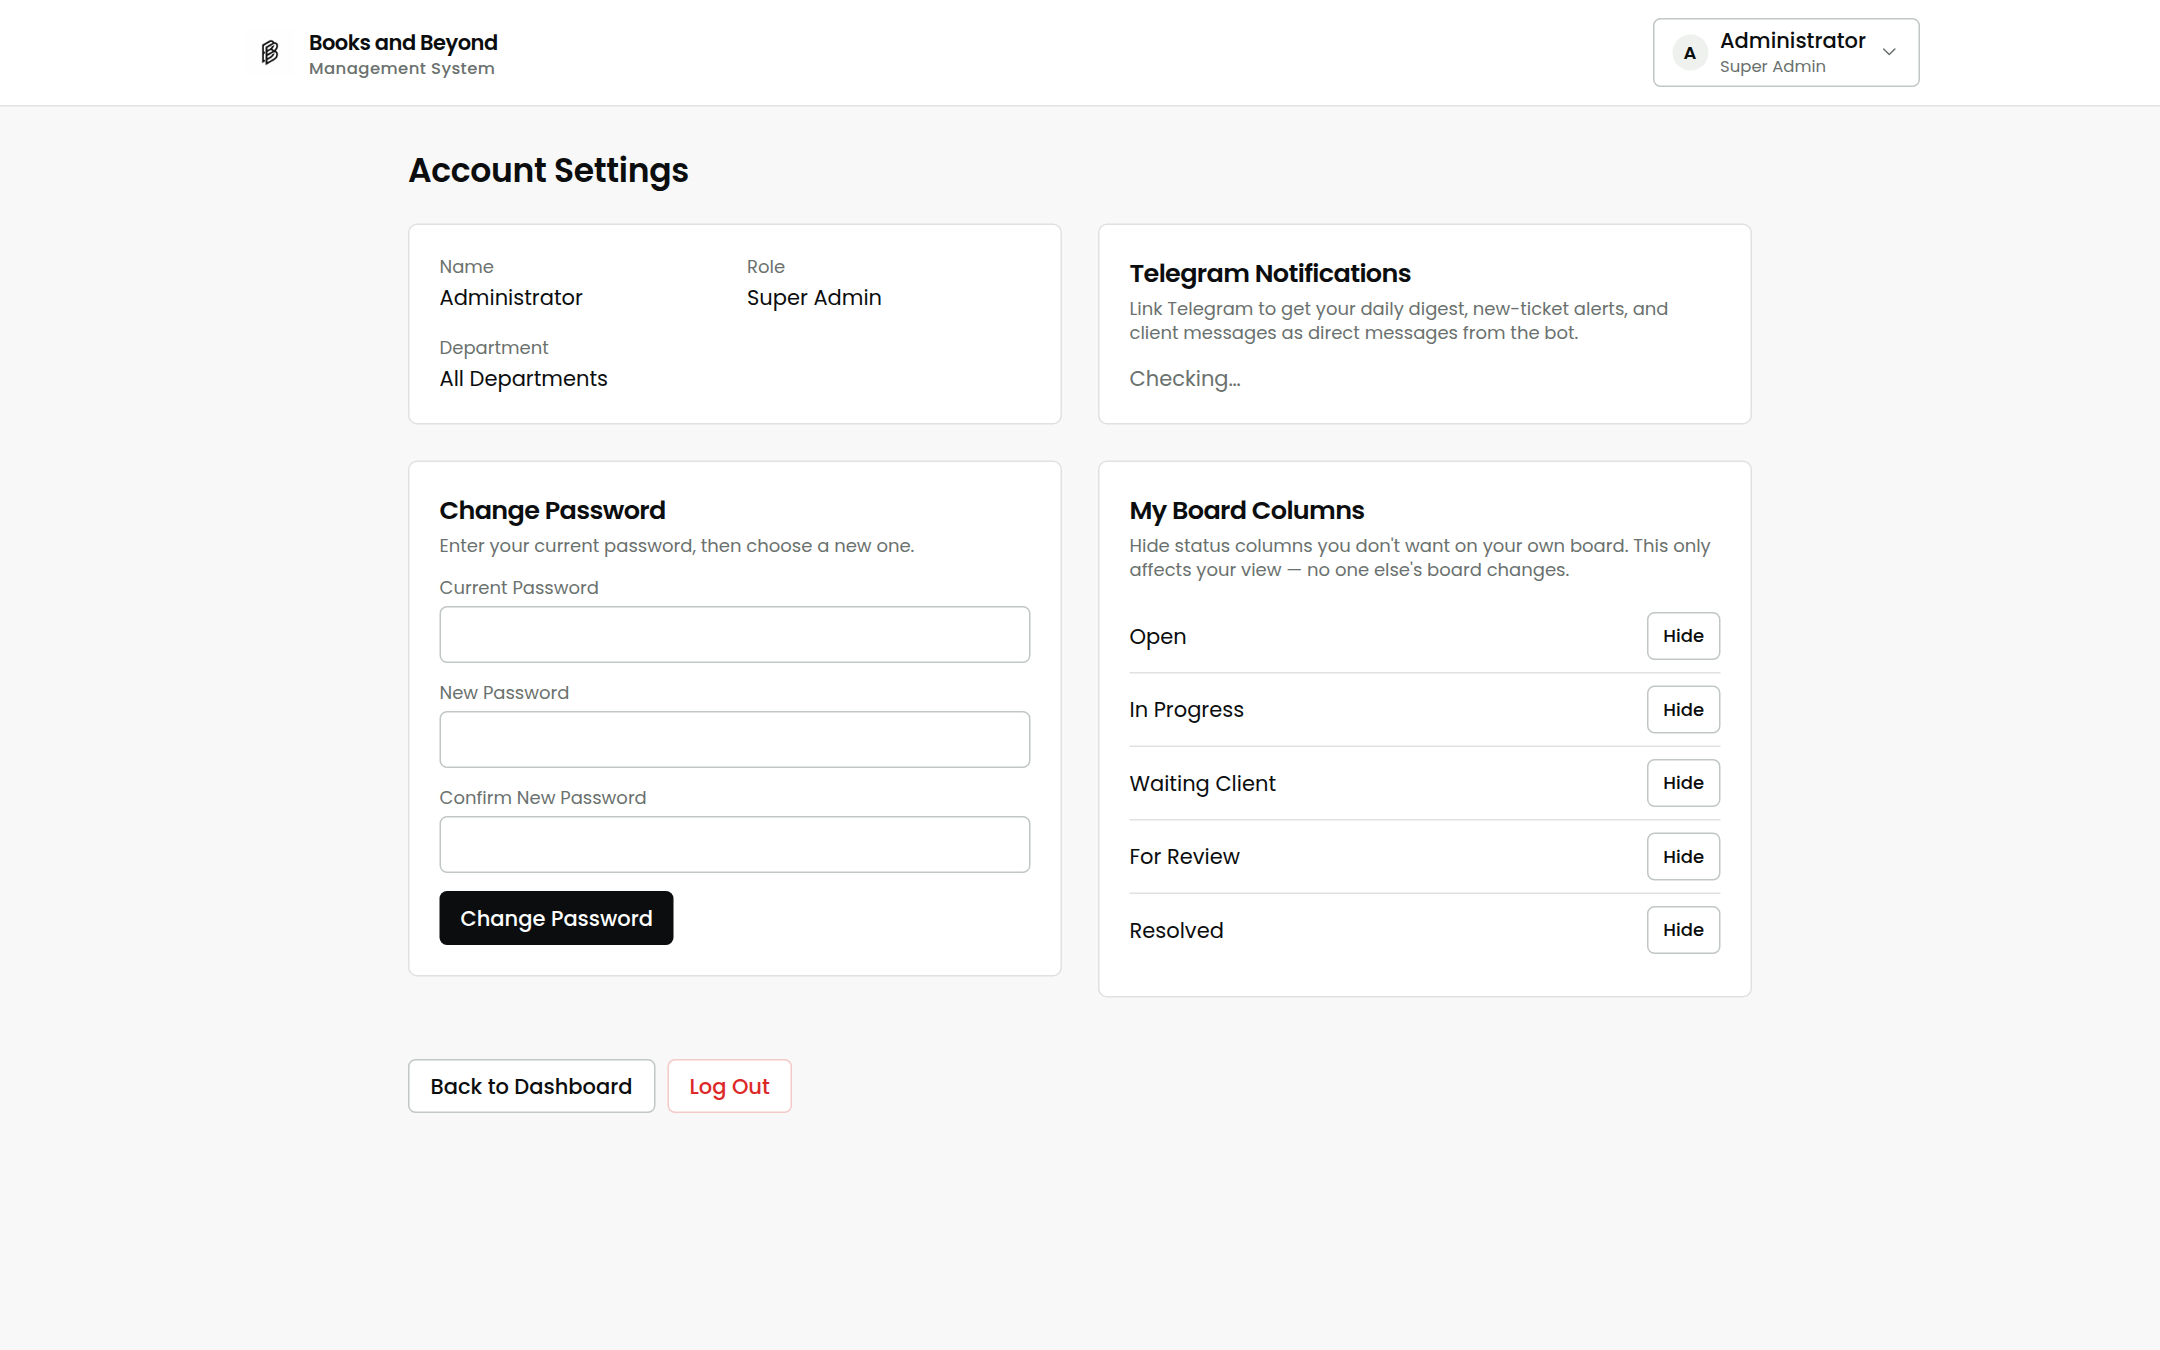
Open the account menu (top right) → Account Settings. Here you can:
- Change your password — enter your current password and a new one (every role, including admins, needs their current password to change their own).
- Link Telegram — get your alerts as direct messages from the bot.
- Hide board columns you don't use — a personal view, no one else is affected.
14.Notifications
You're alerted the moment something needs you — a new ticket, a client reply, an announcement. Alerts arrive three ways:
- In-app — the bell (top right) shows an unread count; click it for the feed.
- Pop-up — a notification pops at the top of the screen the instant it happens, then fades after a few seconds.
- Telegram & email — if set up, the same alert reaches you as a direct message and an email.
There's also a daily deadline-watch email each morning listing your overdue and soon-due tickets, and a team chat (floating widget) where a super admin can post announcements everyone gets notified about.
15.The client portal
What your clients see. They don't log in — they open the private link you share. From there they can submit a new concern and track their own tickets. The same link works on a computer or a phone, adapting to whichever they open it on.
What a client can do
- Submit a concern — raise a new ticket in a couple of taps (see Creating a ticket).
- Track their tickets — see every ticket they've raised with its status and a simple progress bar, shown in plain-language wording (not the internal status names).
- Follow the progress — open a ticket for its step-by-step timeline and, once it's done, the resolution note.
- Message the team — leave a question or note on any ticket and read the team's replies, right there on that ticket.
- See when it's their turn — a ticket waiting on them is flagged Action Needed / Needs Your Reply.
They cannot see who's assigned, the priority, internal notes, or any other client — the portal only ever shows their own, client-safe view.
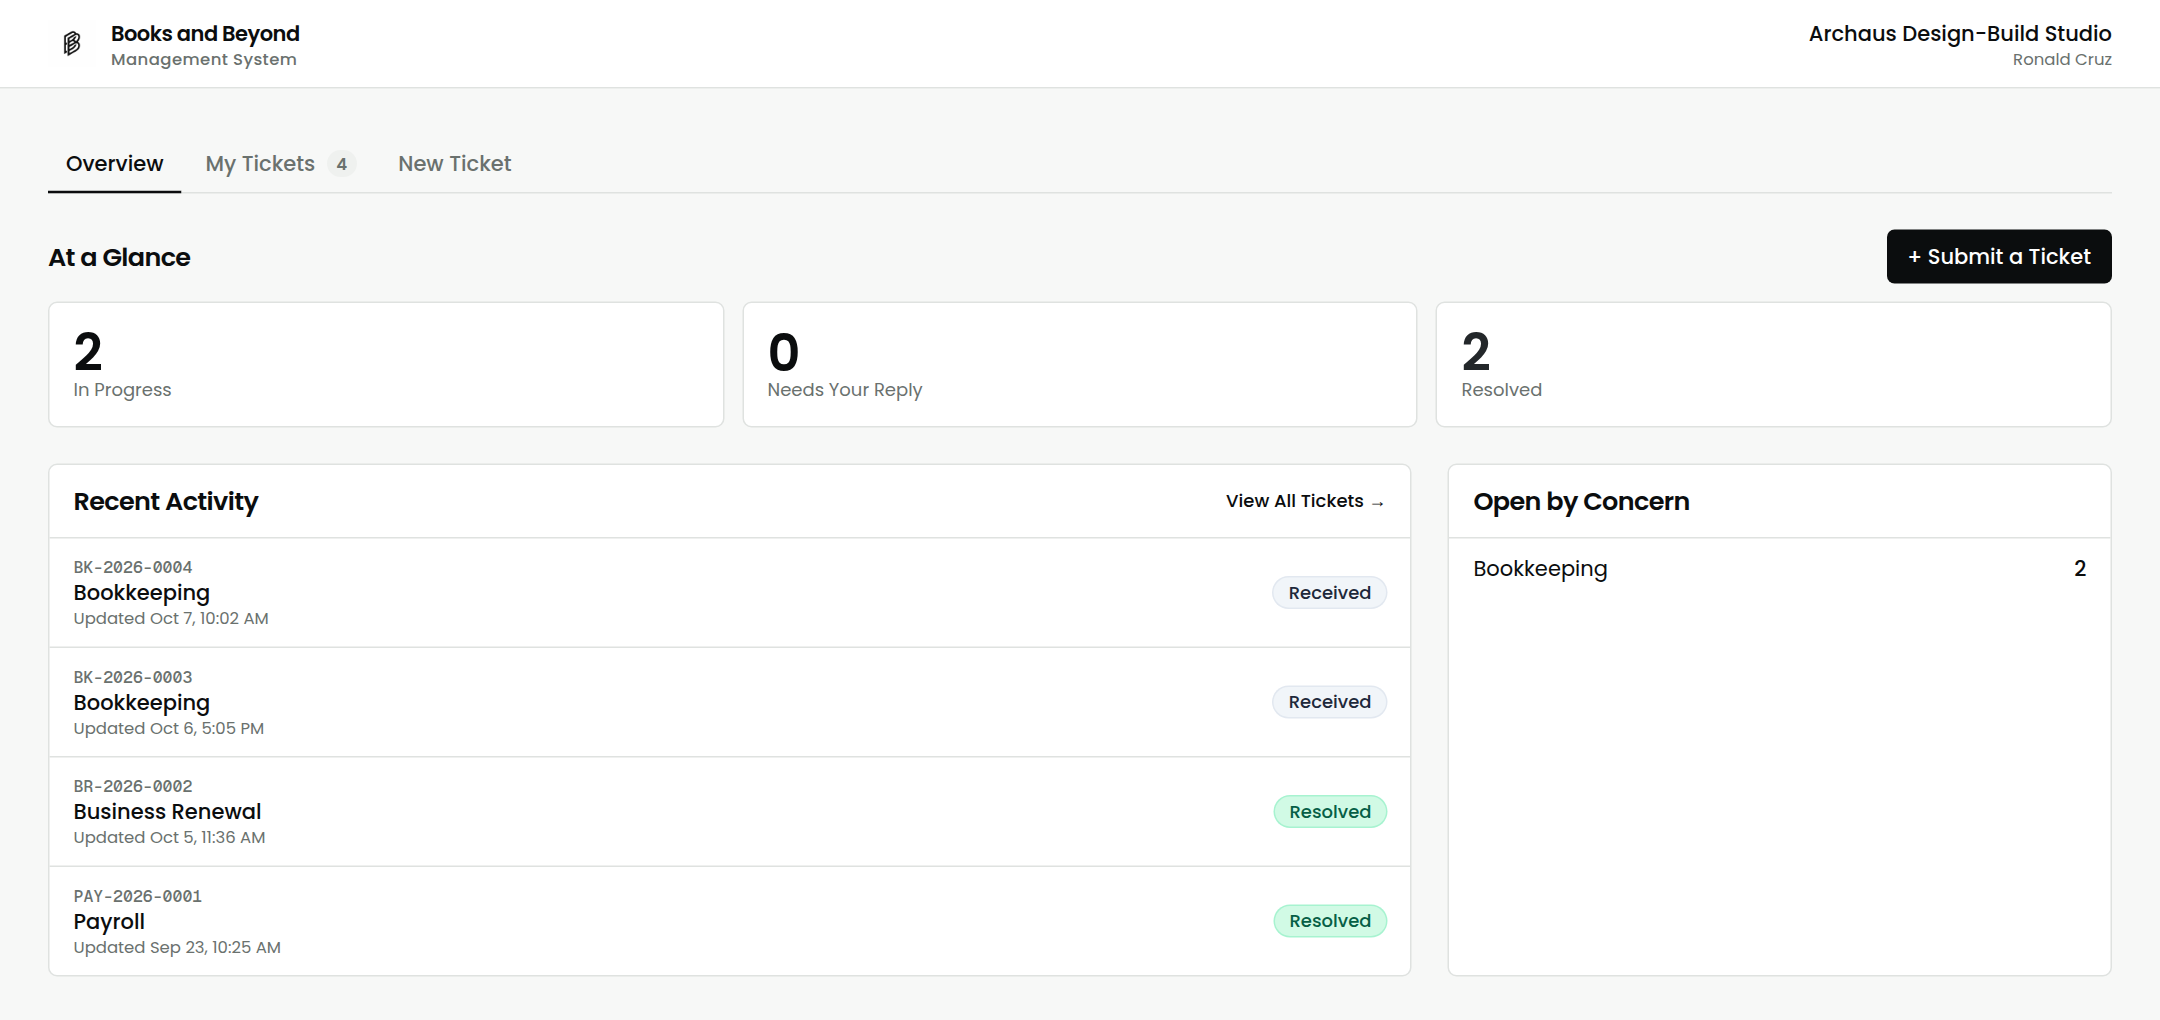
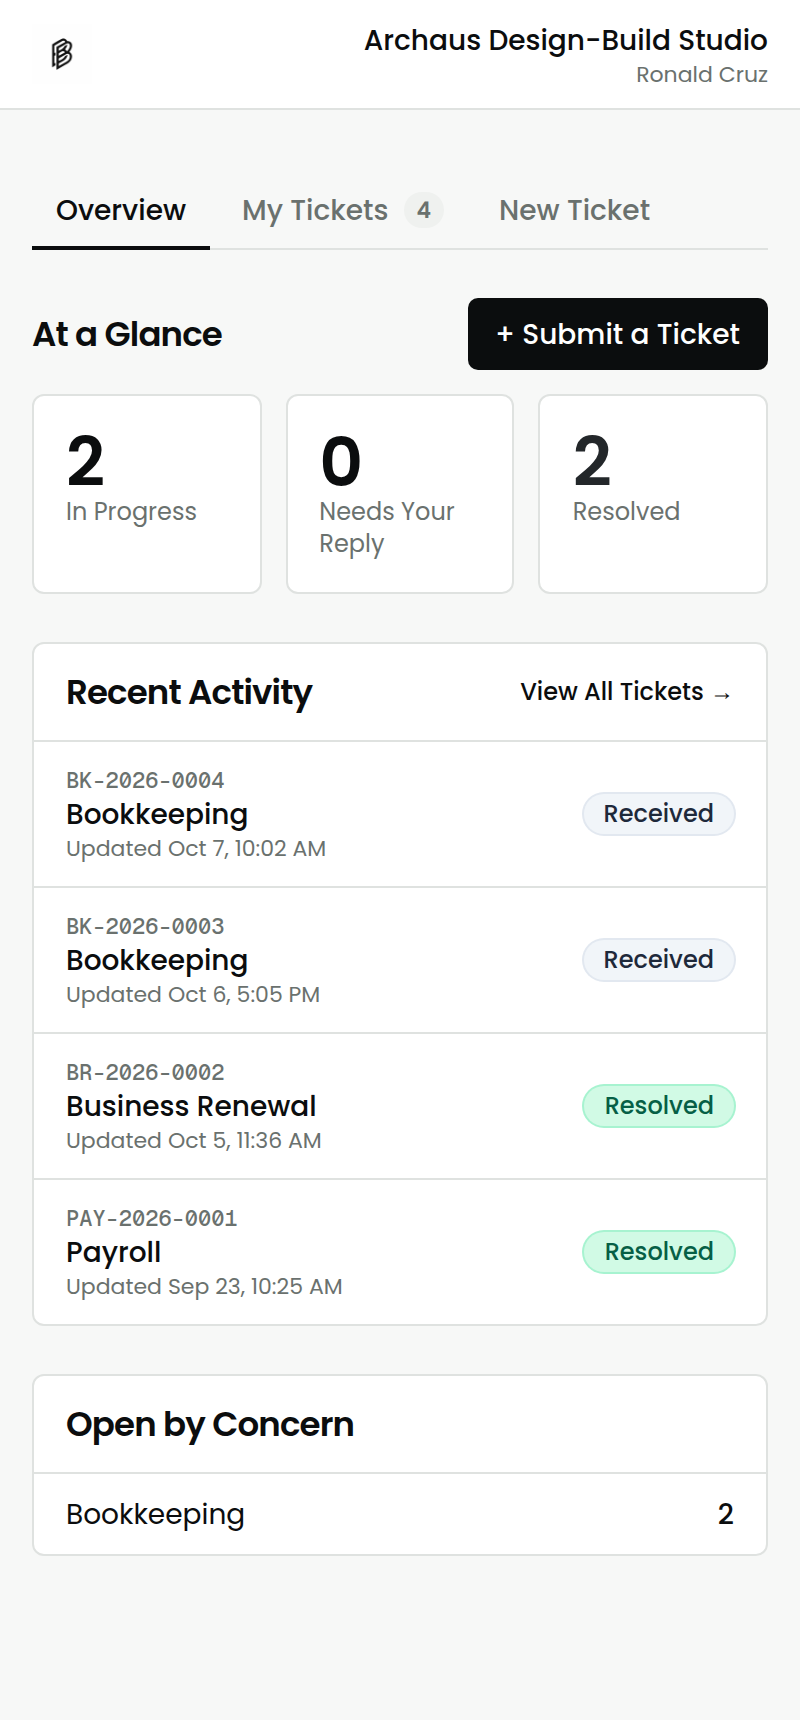
Every concern a client submits here enters the same Pipeline as a staff-created ticket, lands in the reviewer's Set Priority queue, and auto-assigns to the right desk.